If you’ve got a 2015 Fire tablet, it’s no longer necessary to download a separate photo editor app. While it may not be obvious—it’s not even obvious how to access the photos you’ve taken, now that the Photos item has been removed from the main menu ribbon—, there’s now a full suite of photo editing tools available to you, built right into the operating system.
First Things First: Where’s The Menu Option To View My Photos?
It’s clear enough that you’re supposed to tap on the Camera icon when you want to take pictures on your Fire, but what’s not so clear is how to access those photos later on, after you’ve exited the camera function, done some other things on your Fire or shut it down, and have come back to it later.
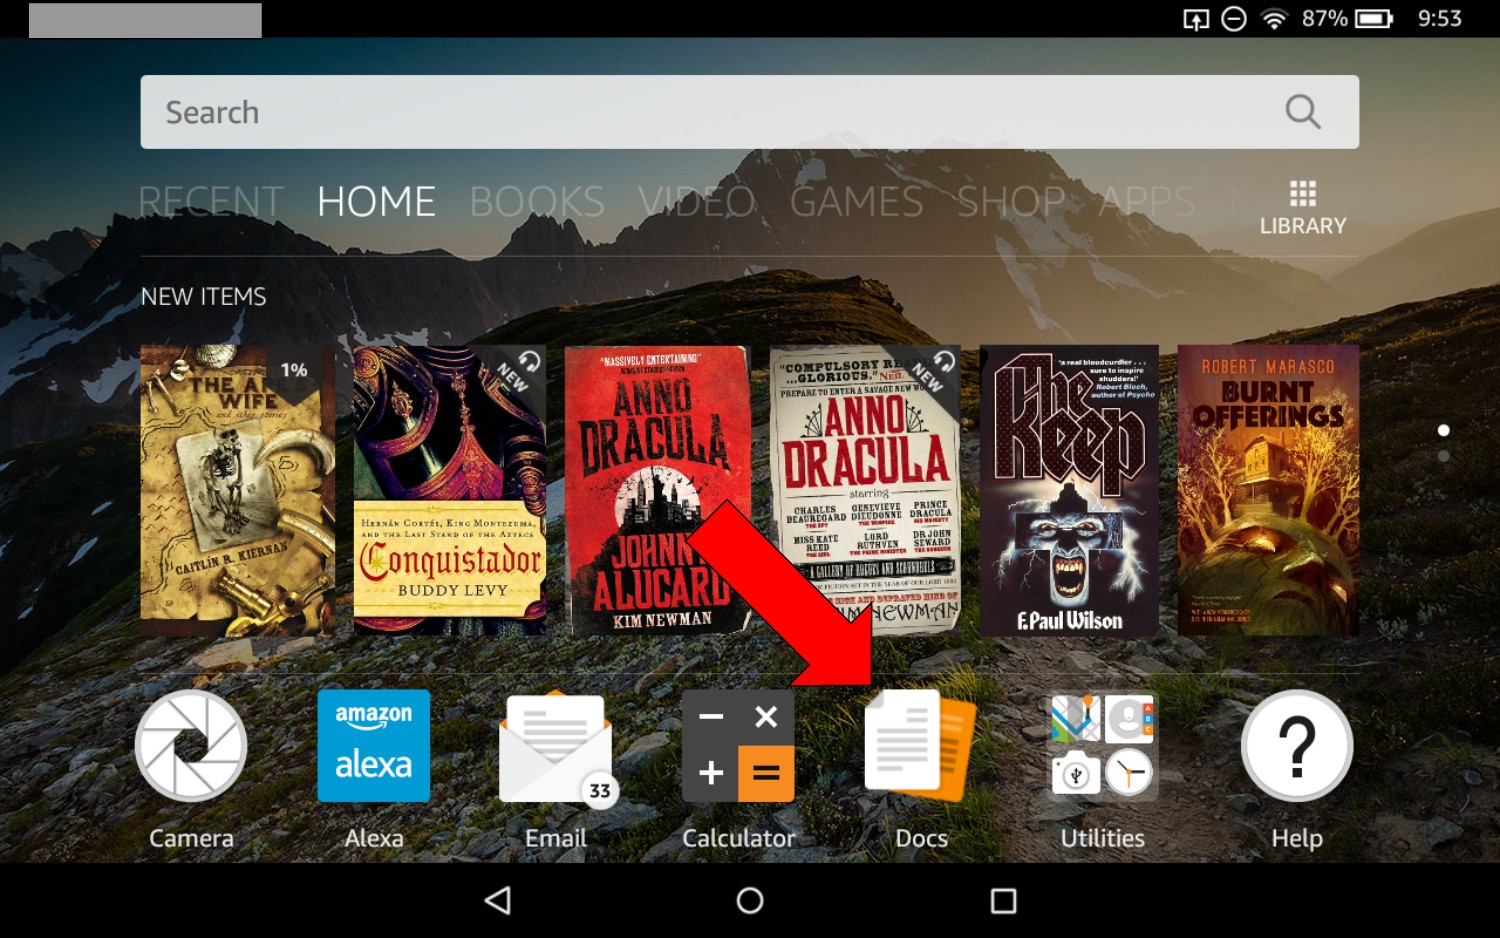
It’s not very intuitive: on a 2015 Fire tablet photos are stored under the Docs menu item, indicated by a red arrow in the screenshot below (tap or click on images to view an enlarged version in a new tab or window):
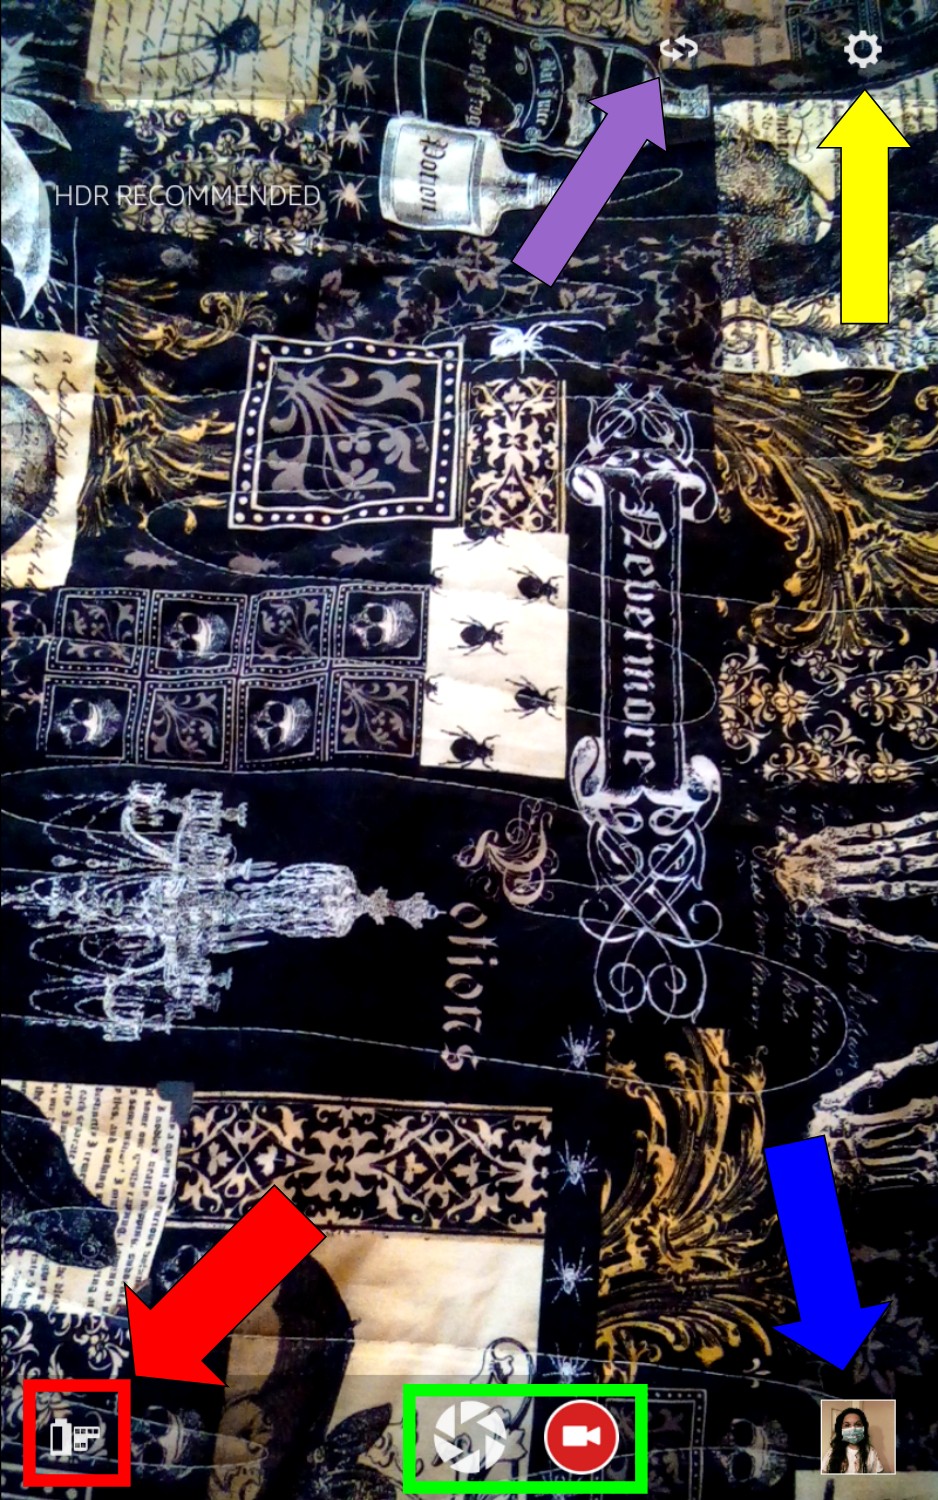
When you tap the Photos folder on the Docs screen (Docs screen not shown), you get one of two default Camera views, depending on which view you last used. You may get the view with Camera Roll closed, where recently-taken pictures are not displayed:
In that case, you can tap on the Camera Roll icon (red box and arrow) to open Camera Roll view, which will provide access to all photos currently stored on the Fire in descending order, from most recent to oldest. More about that in the next section.
Above, I’ve highlighted the Shutter and Shoot Video icons (green box – tap the shutter icon at left to take a picture, tap the videocam icon to start shooting video), last picture taken icon (blue arrow), camera Settings icon (yellow arrow) and Switch Cameras icon (purple arrow – tap to toggle between front and rear cameras).
Accessing the Camera Roll
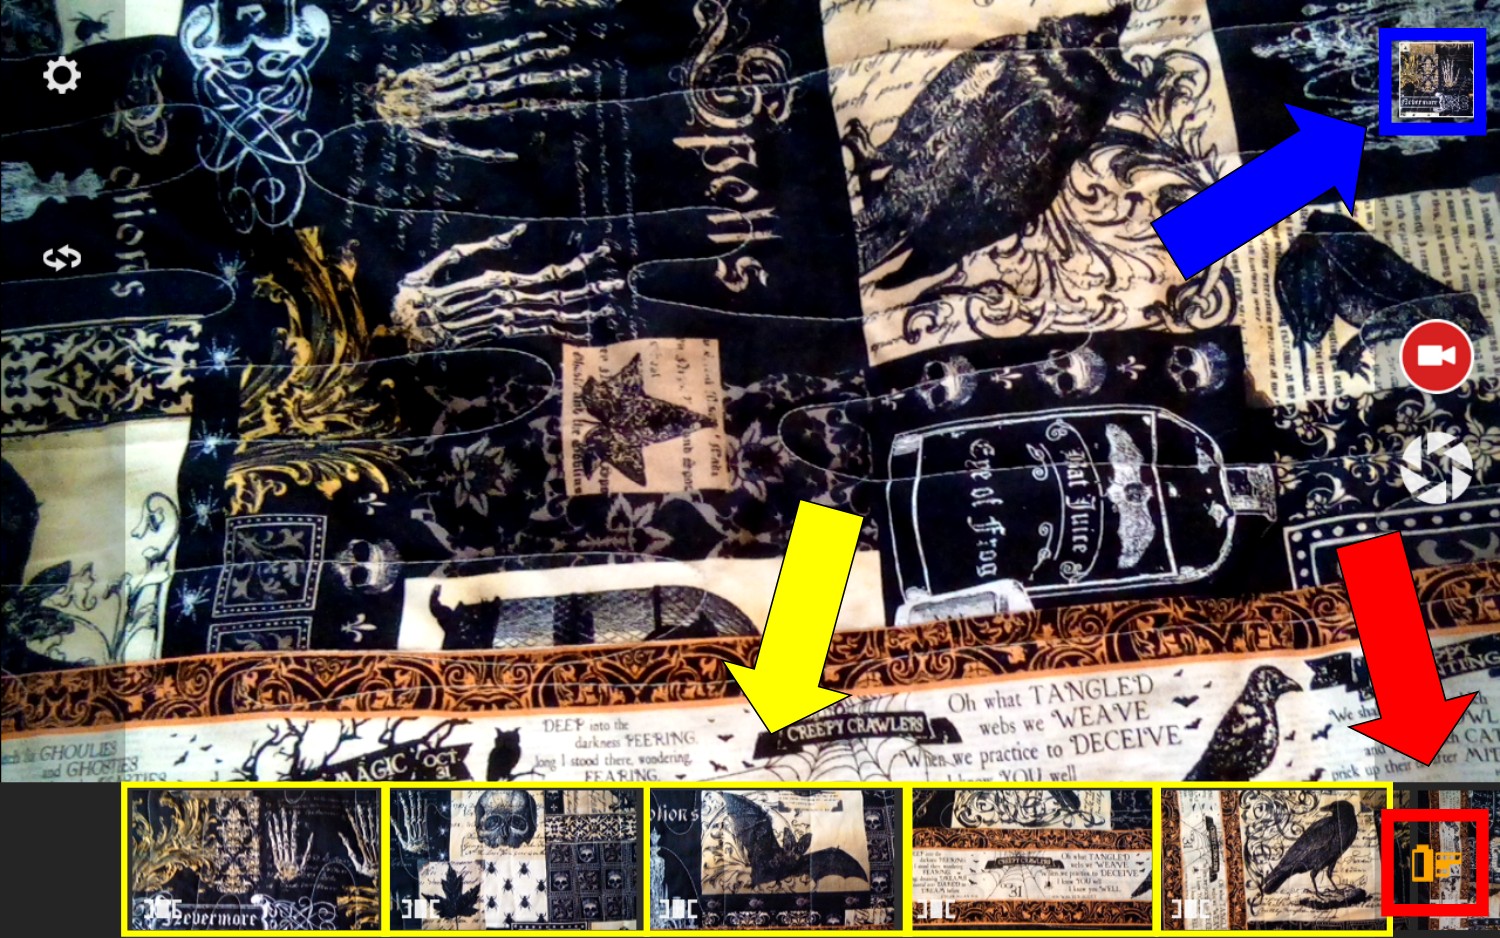
In the screenshot below, I’ve tapped the Camera Roll icon (red box and arrow) to display my stored photos. The blue box and arrow indicate the most recently taken photo, which I can open by tapping if that’s the photo I want to edit.
The yellow arrow and boxes in the image above indicate the Camera Roll, where you can view thumbnail-sized copies of all the photos stored on your Fire. You can swipe left or right to scroll through them, and tap to load a specific image for editing.
Photo Editing Tools
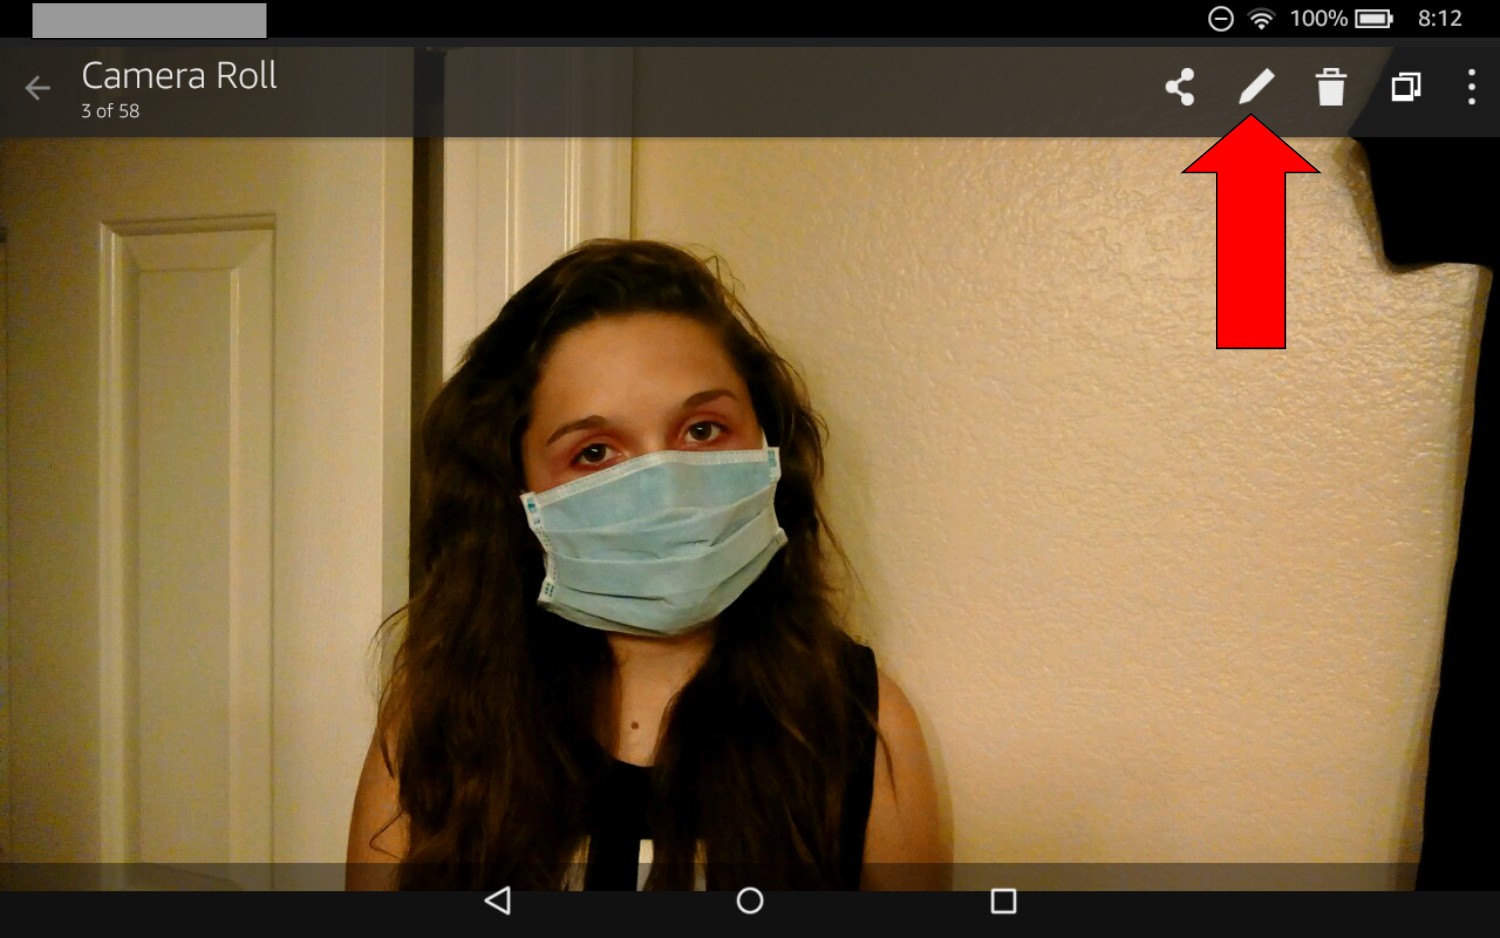
Once you’ve selected a photo to load by tapping on its thumbnail, the Share, Edit and other options icons will be available in the top menu bar. Load Edit options by tapping on the Pencil icon (red arrow):
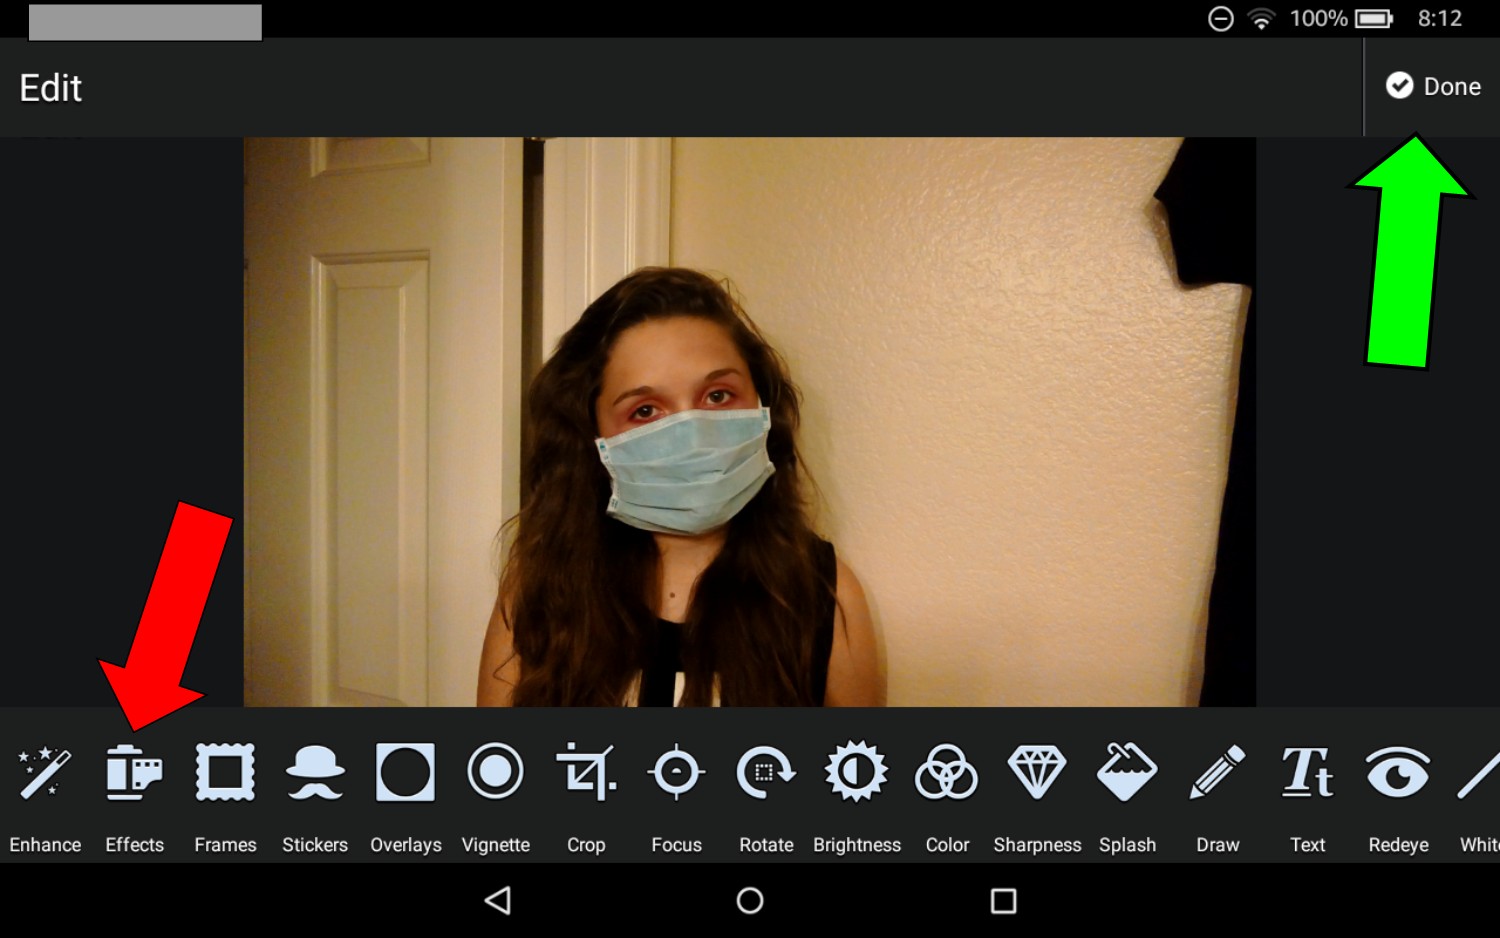
In the screenshot below, I’ve tapped the Pencil icon to open the Edit menu. As you can see, there are many options available here. You can get the best feel for what each one does by trying them out on a photo of your own.
Note the Done icon in the screenshot above (green arrow); after you’ve made changes using the available editing tools, you’ll tap this icon to save a new copy of the photo with your changes. The original, unedited version will still be preserved in a separate file.
Where Are The Filters?
To apply filters, tap the Effects icon (red arrow in screenshot above).
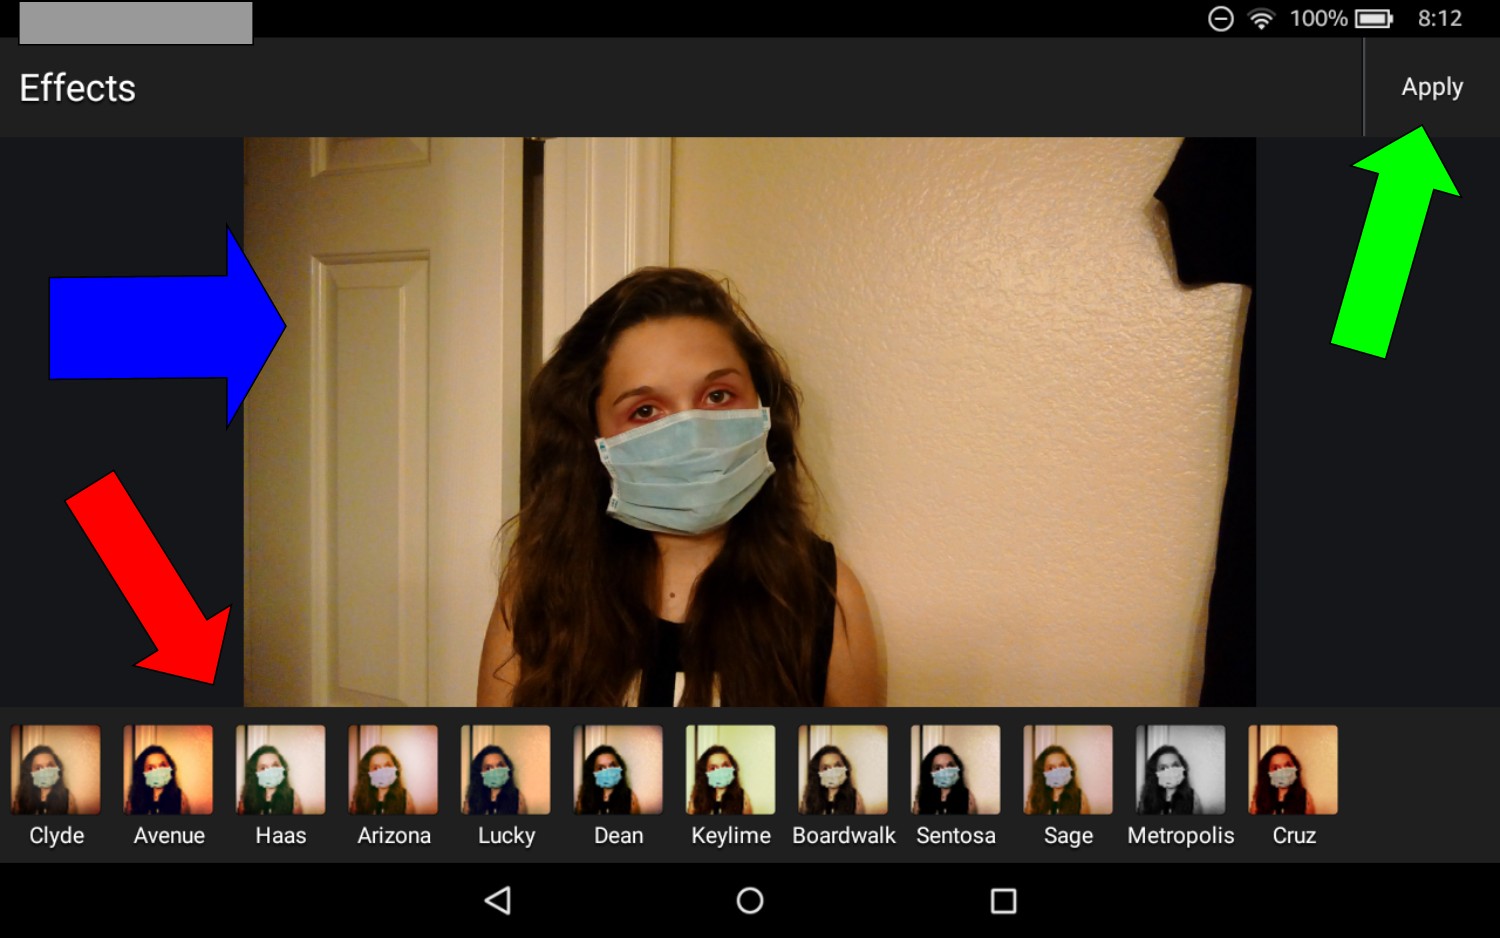
The screenshot below shows available filters. Tap one of the filter icons (red arrow) to see a preview of how it will look on your photo (blue arrow). The filter will not be applied until you tap the Apply link (green arrow).
After you’ve tapped Apply, the link will turn into that Done link I mentioned previously. Tap it to save the edited photo as a new file. Remember: the original will still be there, so you can create as many different versions of it as you like.
Photos have gotten a lot more fun in the 2015 Fire tablet line!
* * *
Tech Tip of the Week: How To Delete OK Google History
* * *

