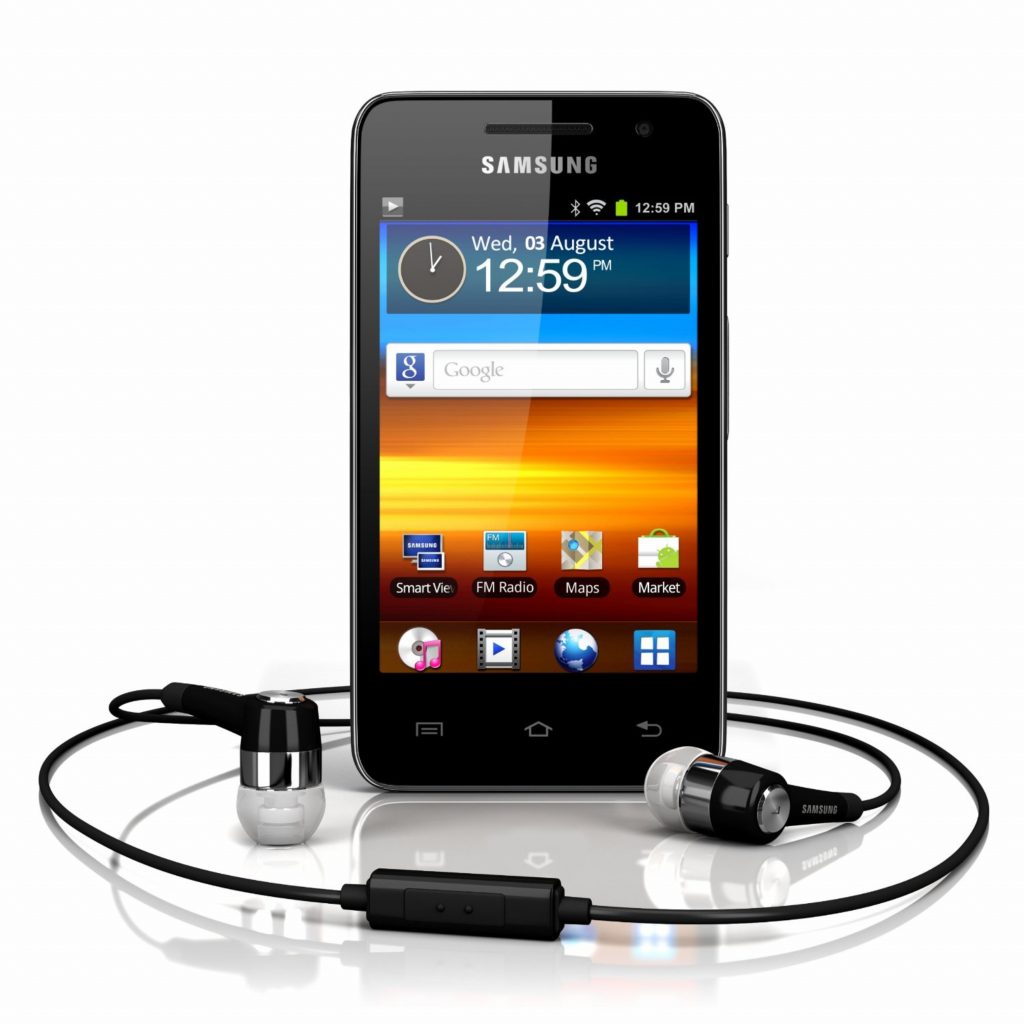
Today’s installment is part 4 in my Escape From iTunes series. In the first post I explained why making the switch from iTunes to Amazon’s MP3 Cloud Player is an especially good move for Kindle Fire owners, since it will free them to get full use of their digital music libraries across all their devices, including the Fire. I’ve already compared the Samsung Galaxy Player 3.6 to the 5th Generation iPod Touch and found them to be virtually identical in functionality (though not in price!). I also compared iTunes to Amazon’s MP3 Cloud Player for use as a music player and library management tool, and concluded Cloud Player is a worthy substitute.
Enough about the whys of leaving iTunes, today I’m getting into the how. The following tutorial explains how I made the switch from an iPod + iTunes to a Samsung Galaxy Player 3.6 + Amazon’s MP3 Cloud Player, but the same basic steps can be used regardless of the portable player you choose to replace your iPod.
Step One: Move Your Music Library Out Of iTunes And Into Amazon’s MP3 Cloud Player
1. Decide If You Need To Sign Up For Cloud Player Premium
There are two reasons why you might need or want to sign up for Cloud Player Premium: 1) your library of digital music purchased from sites other than Amazon is close to, or larger than, the 5GB of free Cloud storage Amazon already provides for all its customers, or 2) you want a reliable, offsite backup solution for your digital music that requires no ongoing maintenance from you.
If either of these situations fits, then the $24.99 annual fee (as of this writing) for Cloud Player Premium will be both necessary and totally worth the fee. To sign up:
a. Log in to your Amazon account and select Your Account from the drop-down ‘Your Account’ menu.
b. On the Your Account screen, scroll down to the Digital Content section and click on the Manage Your Cloud Subscriptions link.
c. Choose the Cloud Player Premium subscription and click Upgrade, then enter payment details as desired
You can go back to the Manage Your Cloud Subscriptions page at any time in the future to unsubscribe from Cloud Player Premium, but if you decide to do so, remember to ensure you have saved or downloaded copies of all your digital music files before your current Cloud Player Premium subscription period ends.
2. Upload Your Music To Cloud Player
Log In To Amazon, Open Your Cloud Player And Install The MP3 Uploader
a. Log in to your Amazon account and select Your Cloud Player from the drop-down ‘Your Account’ menu.
b. Click the ‘Upload Your Music’ button, and when prompted, download and install the MP3 Music Uploader.
Upload Your Music
The MP3 Uploader is optimized to work best in the Google Chrome and Firefox browsers, but the Cloud Player itself works just fine in Internet Explorer. If you don’t already have Chrome or Firefox, follow the links in this section to download one or the other – both are free.
In Chrome or Firefox:
a. Login to your Amazon account and select Your Cloud Player from the drop-down ‘Your Account’ menu.
b. Click the ‘Upload Your Music’ button and follow the prompts to either let the Uploader search for your music or to specify a folder where your music is stored on your computer or network. If your library is very large, this upload process can take many, many hours. My upload of approximately 30GB of music took about 38 hours. It’s fine to let the Uploader keep doing its work in the background while you do other things, and you may also need to let it run overnight.
Step Two: Tinker And Tweak As Desired
Note For Cloud Player Premium Users
If you signed up for Cloud Player Premium, when your music library is scanned any songs you have that are also available in Amazon’s MP3 Music Store will be replaced in the Cloud with Amazon’s file. The good thing about this is that you’ll be getting a very high-quality file, possibly higher quality than the one in your original library. The bad thing about it is that if Amazon’s copy of the song is from a different album than yours, the copy you’ll get in the Cloud will reflect Amazon’s album details, not the album details from your original library.
For the most part, this is a non-issue. The only places where it cropped up in my own, massive library was with obscure tracks where I didn’t own the entire album anyway, or where the tracks came from various compilations. For example, my copy of The Beatles’ Help may have come from the Milennium Collection album, whereas Amazon’s may be from the Beatles album on which that song was originally released. You may or may not care to correct album details.
See the Correcting Song Details section, below, for further instructions on this.
Set Up Your Playlists, Clean Up Genres And Album Names
Note: Music library management tasks like the following are easiest to do while logged into the main Amazon site from your computer, not from the app on your portable device.
Create any Playlists you’d like in the Cloud Player program. You can start with a search for similar items, or add items to playlists individually. Simply click the checkmark box next to desired items and then click on the Add To Playlist button. To create a new list, follow the same steps but after you’ve clicked Add To Playlist, click New Playlist and enter your desired playlist name.
Browse your library from the Genre and Albums tabs to see if you’re in agreement with how Amazon grouped your music. If you see many copies of the same album cover in Albums view, that means Amazon matched those tracks to multiple, different albums in its own catalog. In that case, you can edit the album name for any song to get everything grouped back onto the same album (see Correcting Song Details, below).
The Genre thing should only be an issue if you made some Genre changes to your music in iTunes, but you may also find it convenient to minimize the number of Genres for purposes of creating playlists by Genre later on.
Correcting Song Details
To correct Genre name, Album name, or any other details about your music files, use the Cloud Player Search field (upper right corner in Cloud Player) to find the song(s) or album(s) you want to edit. When you mouse over a song or album, you’ll see a downward-pointing arrow to the right. Click on it and select Edit Song Info to open the Song Details/Info dialog box and make changes. You can also simply click on the Get Info From Amazon button on the dialog to let Amazon fill in any missing data with data from its own catalog.
You can make changes to multiple songs or albums simultaneously by selecting all the songs or albums for which you want to edit something (e.g., Genre), then click the downward-pointing arrow next to the top selected item in your list to open the Edit Song Details/Info dialog box. Some of the data item fields may be dimmed on the pop-up when you do this, where it doesn’t make sense to change a given field for more than one song or album at a time, but most fields will be editable. The Get Info From Amazon button will be dimmed when you have multiple songs or albums selected.
Make your desired changes and Save.
 Step Three: Set Up Your Portable Player
1. Buy And Fully Charge Your New, Non-Apple Portable Music/Media Player
Self-explanatory.
2. Set Up Your Wifi Connection
In your player’s Settings menu, tap the Wifi option and connect to an available wifi network.
3. Install The Amazon Appstore App
Once connectected to a wifi network, use your device’s web browser to go to the Amazon site. A special, mobile broswer version of the site will load automatically. Scroll down to select Android Apps or Appstore from the mobile site menu.
On the page that loads, there will be a button to download the Amazon Appstore app. Click the button and follow the prompts to install that app. At some point during the install you may be prompted to change your device’s settings to accept ‘unknown’ downloads; if so, follow the prompts to make that change, then complete the download of the app. Double-tap the downloaded file to install it.

Double-tap the Amazon Appstore app to launch it, login to Amazon when prompted (you’ll only have to do this once, not every time you use the app) then use it to look up, download and install the MP3 Cloud Player App and Audible App (if you have any Audible audiobooks you’d like to listen to on your portable player).
5. Start Streaming And Downloading Your Music!
Double-tap the MP3 Cloud Player App icon to launch it, login to your Amazon account when prompted—you only have to do this once, not every time you launch the app. Wait a few moments while the app scans your Cloud Player library, then start enjoying your music! To use your portable player’s built-in music player instead of Cloud Player, you’ll have to load your music directly onto the player. You can download individual tracks, albums or playlists from within the Cloud Player app by tapping the downward-pointing download arrow icon next to the desired item.
You can also load your entire music library onto a micro SD card to make it available to your player’s built-in music player, or to make it available in the MP3 Cloud Player App even when you don’t have a wifi connection; I’ll be covering how to do that in the next post in this series.
6. Start Listening To Audiobooks!
If you have any Audible audiobooks, double-tap the Audible App to launch it and login to your Amazon account when prompted—you only have to do this once, not every time you launch the app. Wait a few moments while the app scans your audiobook library, then tap the download icon next to any title to download it to your player. In a few moments, even before the download is complete, you’ll see a message saying you can begin listening to the audiobook.
Congratulations! You’ve freed yourself from iTunes!
Next In the Series: Getting DRM-Protected Music Files Out Of iTunes And Into Cloud Player, Loading Your Entire Music Library Onto Your Portable Player


Hi. Just saw this on Facebook. How can I get the previous episodes of this info.
Thanks,
Pat
Here’s a link to the last post in the series; it has links to all the prior posts in the series at the beginning.