
It’s your friendly KF on KND Editor April Hamilton here, continuing this week’s series about the new, 5th generation line of Fire tablets.
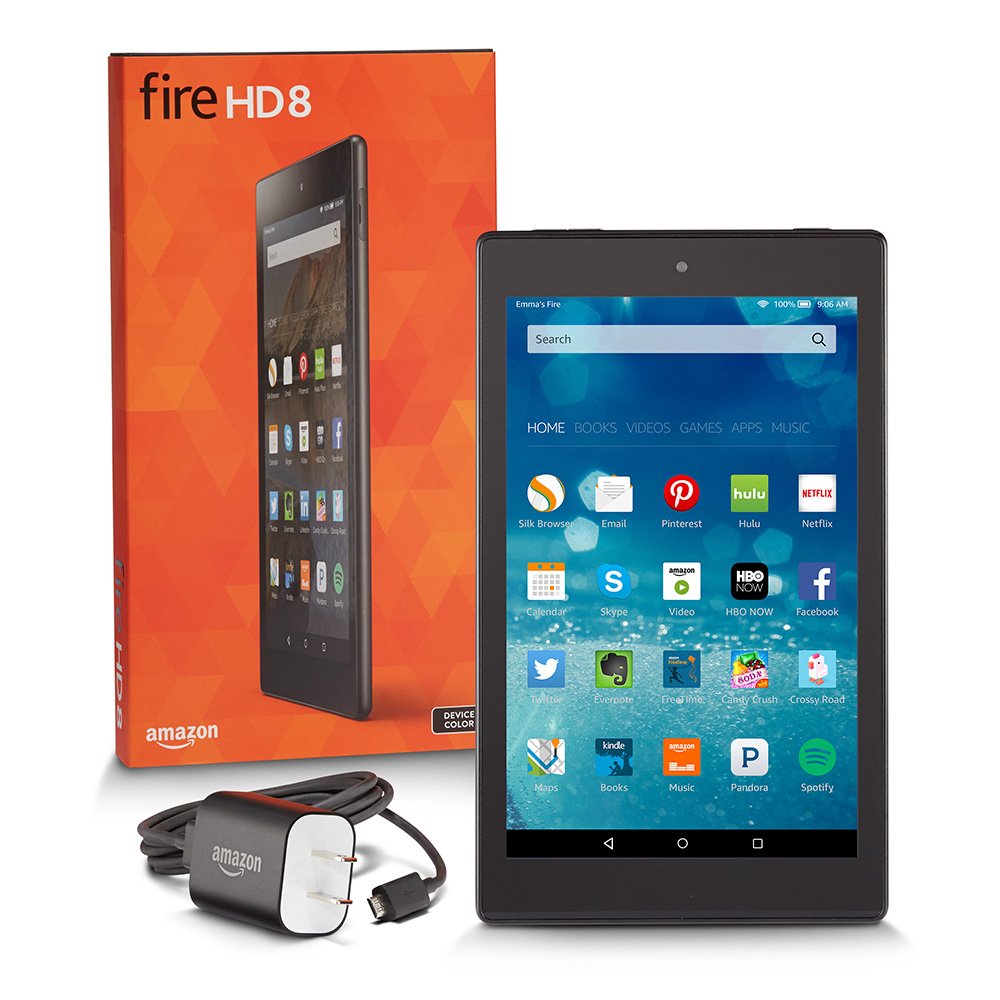
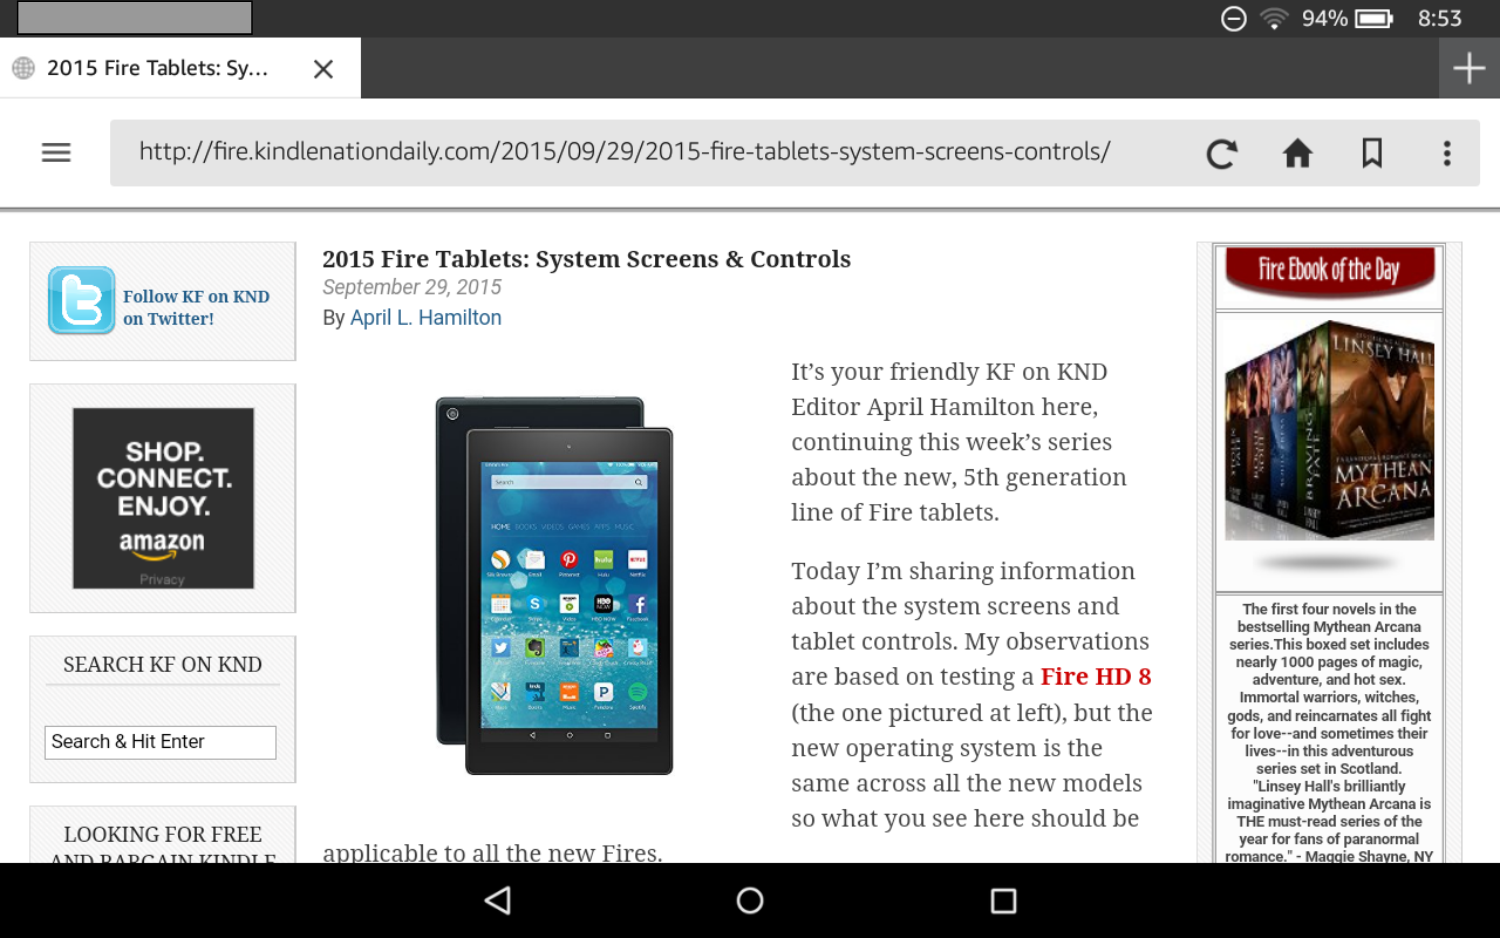
Today I’m sharing information about the Silk browser in the new Fires. My observations are based on testing a Fire HD 8 (the one pictured at left), but the new operating system is the same across all the new models so what you see here should be applicable to all the new Fires.
Where identifying details appear in the screenshots from my own tablet, I’ve placed a gray box over them; the gray box(es) will not be there on your own Fire screens.
Silk Browser Overhaul
People have been complaining about the limited functionality and feature set of the Fire’s Silk browser ever since the first Fire tablet was released, but they’re not going to have much to complain about anymore because the new version has virtually all the same features as all the most popular desktop browsers.
There are a LOT of screenshots here, because there’s a LOT to share. Tap or click on images to view the full screens in a new tab or window.
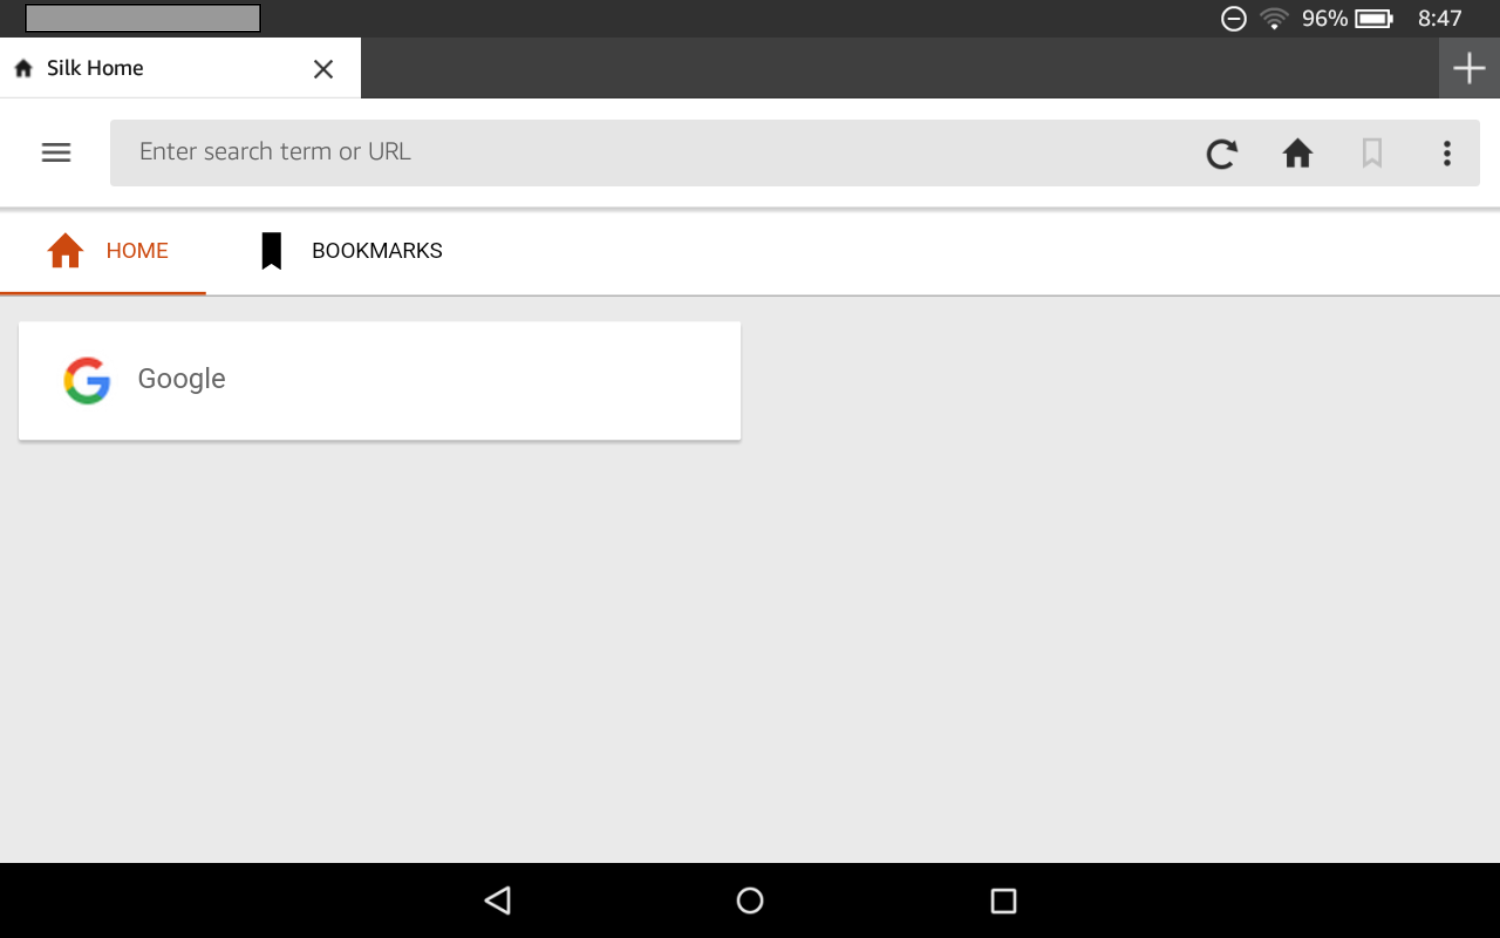
Silk Home – Here’s what you see the first time you load the Silk browser, before you’ve actually done any browsing. Notice the various icons.
The icon with the three short, horizontal lines at the upper left corner opens the Silk Options menu; that type of menu icon is known as a “hamburger”, because it kind of resembles two halves of a bun with a burger patty between them. Details of that menu are provided later in this post.
The Re-load, Home and Bookmarks icons to the right of the URL/Search bar are probably already familiar to anyone who’s used a browser. In the screenshot below the bookmarks icon is grayed out/disabled because I’d not yet set any bookmarks. When you have a page loaded and tap the bookmarks icon, a standard ‘save bookmark’ form opens, with options to customize the name of the bookmark just like in a desktop browser.
To the right of the grayed-out bookmarks icon you’ll see the Page Options menu icon, which is three vertical dots. I’ll go into more detail on that menu later on, too.
Beneath the URL/Search bar, you’ll see shortcuts to Home and Bookmarks.
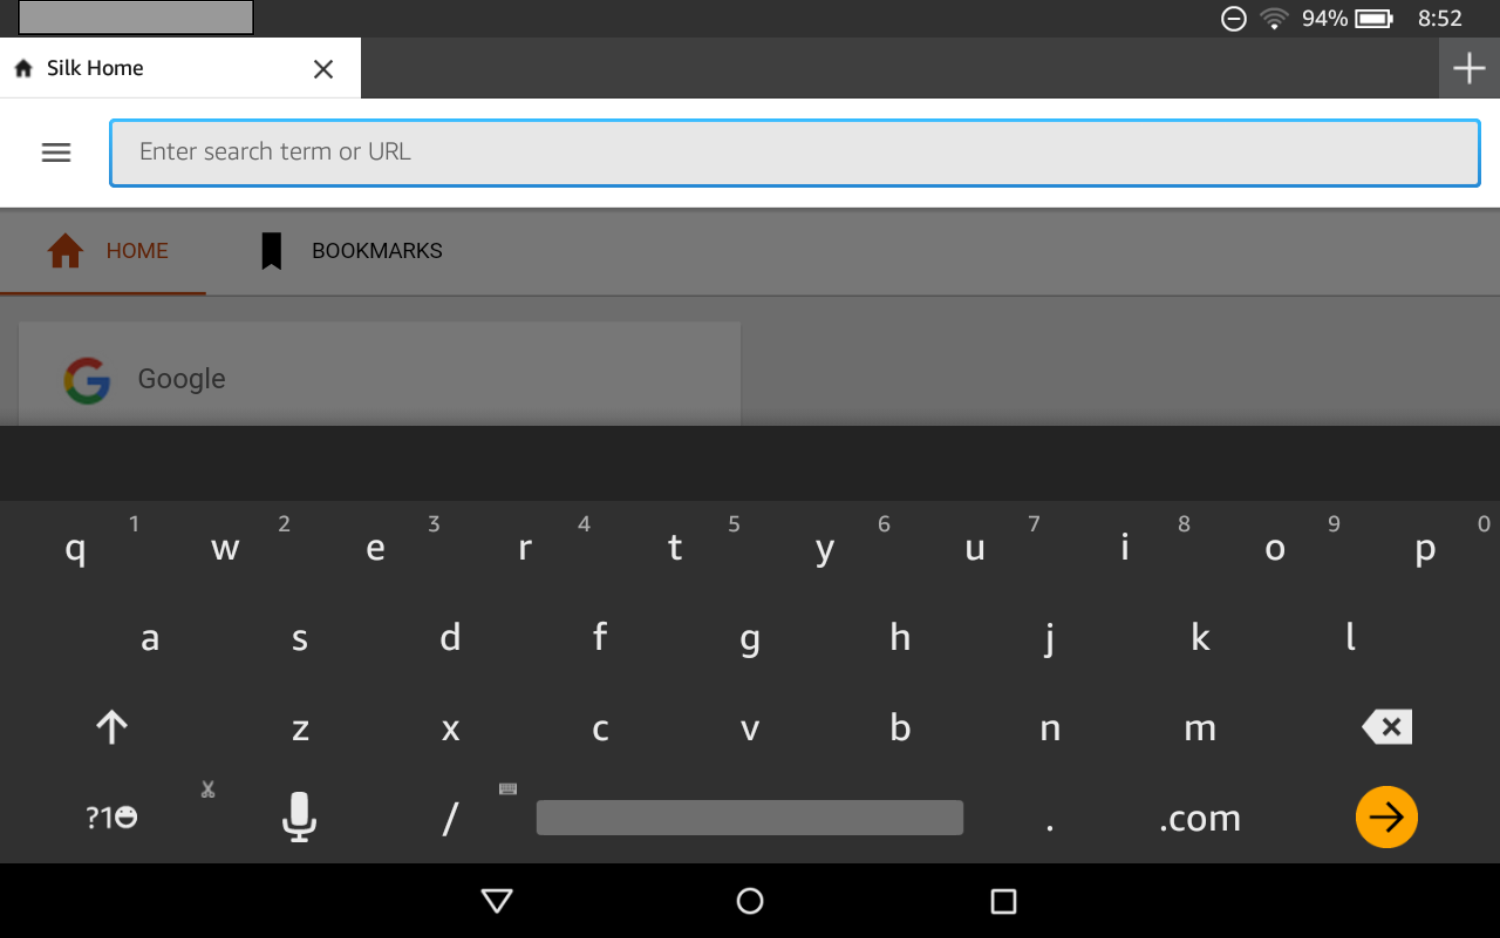
On-Screen Keyboard – In the screenshot below, I’ve tapped to place the cursor in the URL bar to open the keyboard. The keyboard is from the Fire’s Bellini operating system and it’s the same for all standard Fire programs and functions, it’s not specific to the Silk browser.
Notice how it’s been enlarged a bit in the new operating system, and how it shades the background image when it’s active. Also notice the microphone icon; tap to use the voice recognition/dictation feature.
Also notice the smiley face on the key at the lower left corner of the keyboard. This means emoji / smilies are available. Tap that key to load the numbers and special characters keyboards.
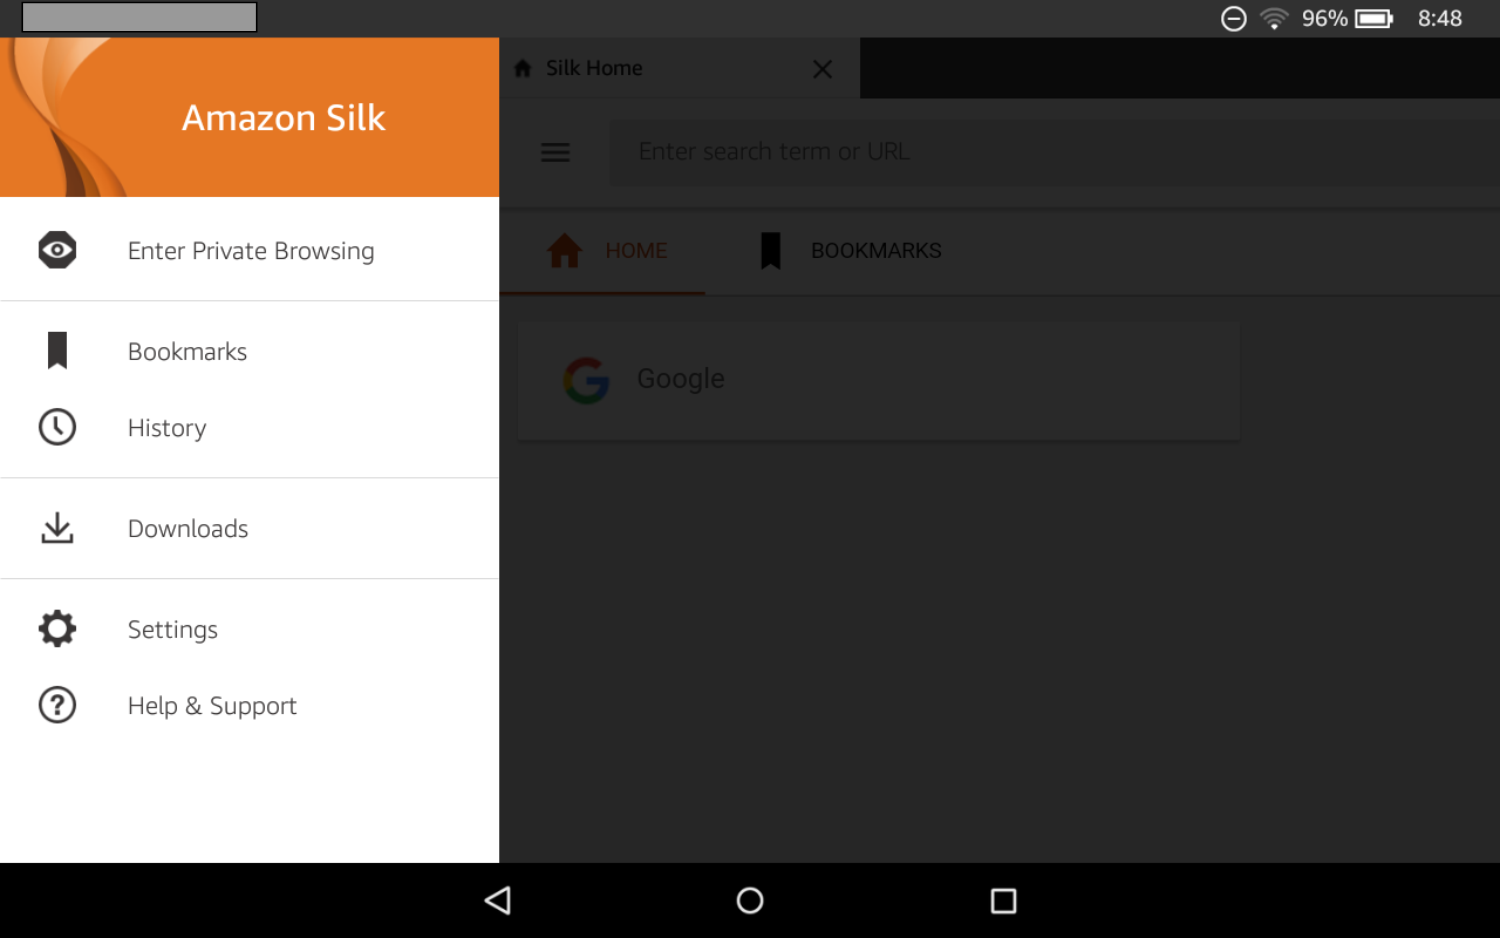
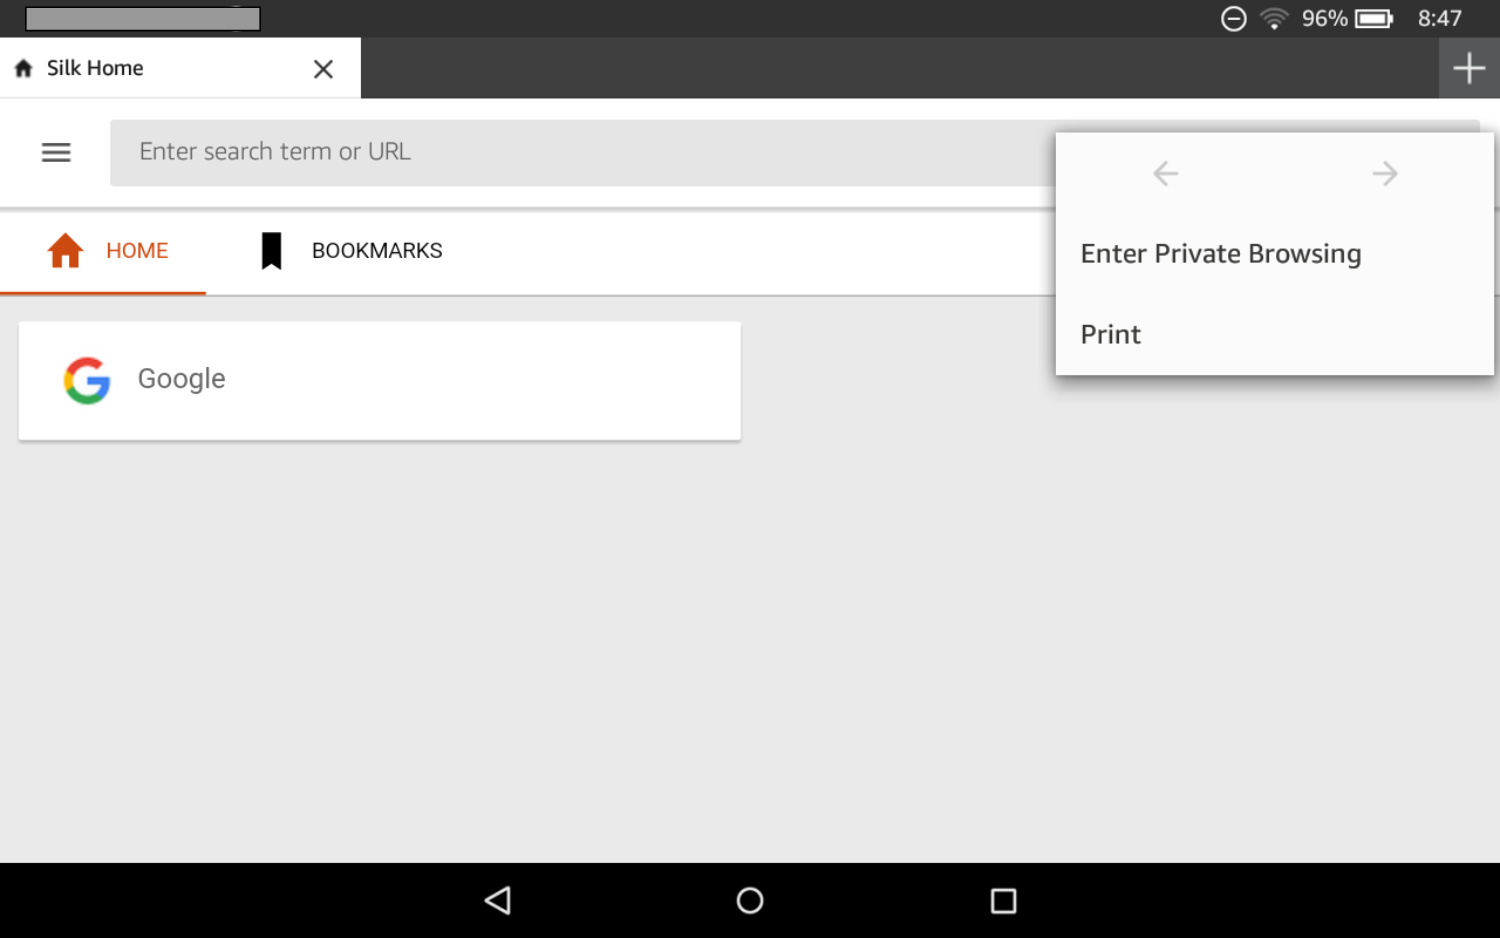
Options Menu – In the screenshot below, I’ve tapped the hamburger icon to open the Silk Options menu. Remember that in the new Fires, you’ll use the little backward-pointing triangle icon (Back) to exit from screens and menus.
Enter Private Browsing opens a private browser tab: whatever you do in a private browser window or tab will not be tracked by the browser’s History file.
I’ll go into more detail on Bookmarks and History below.
Downloads is a shortcut link to quickly access a list of anything you’ve downloaded while using the Silk browser.
Settings will be explored later in this post.
Help & Support is a shortcut link to access Amazon’s available Fire support options.
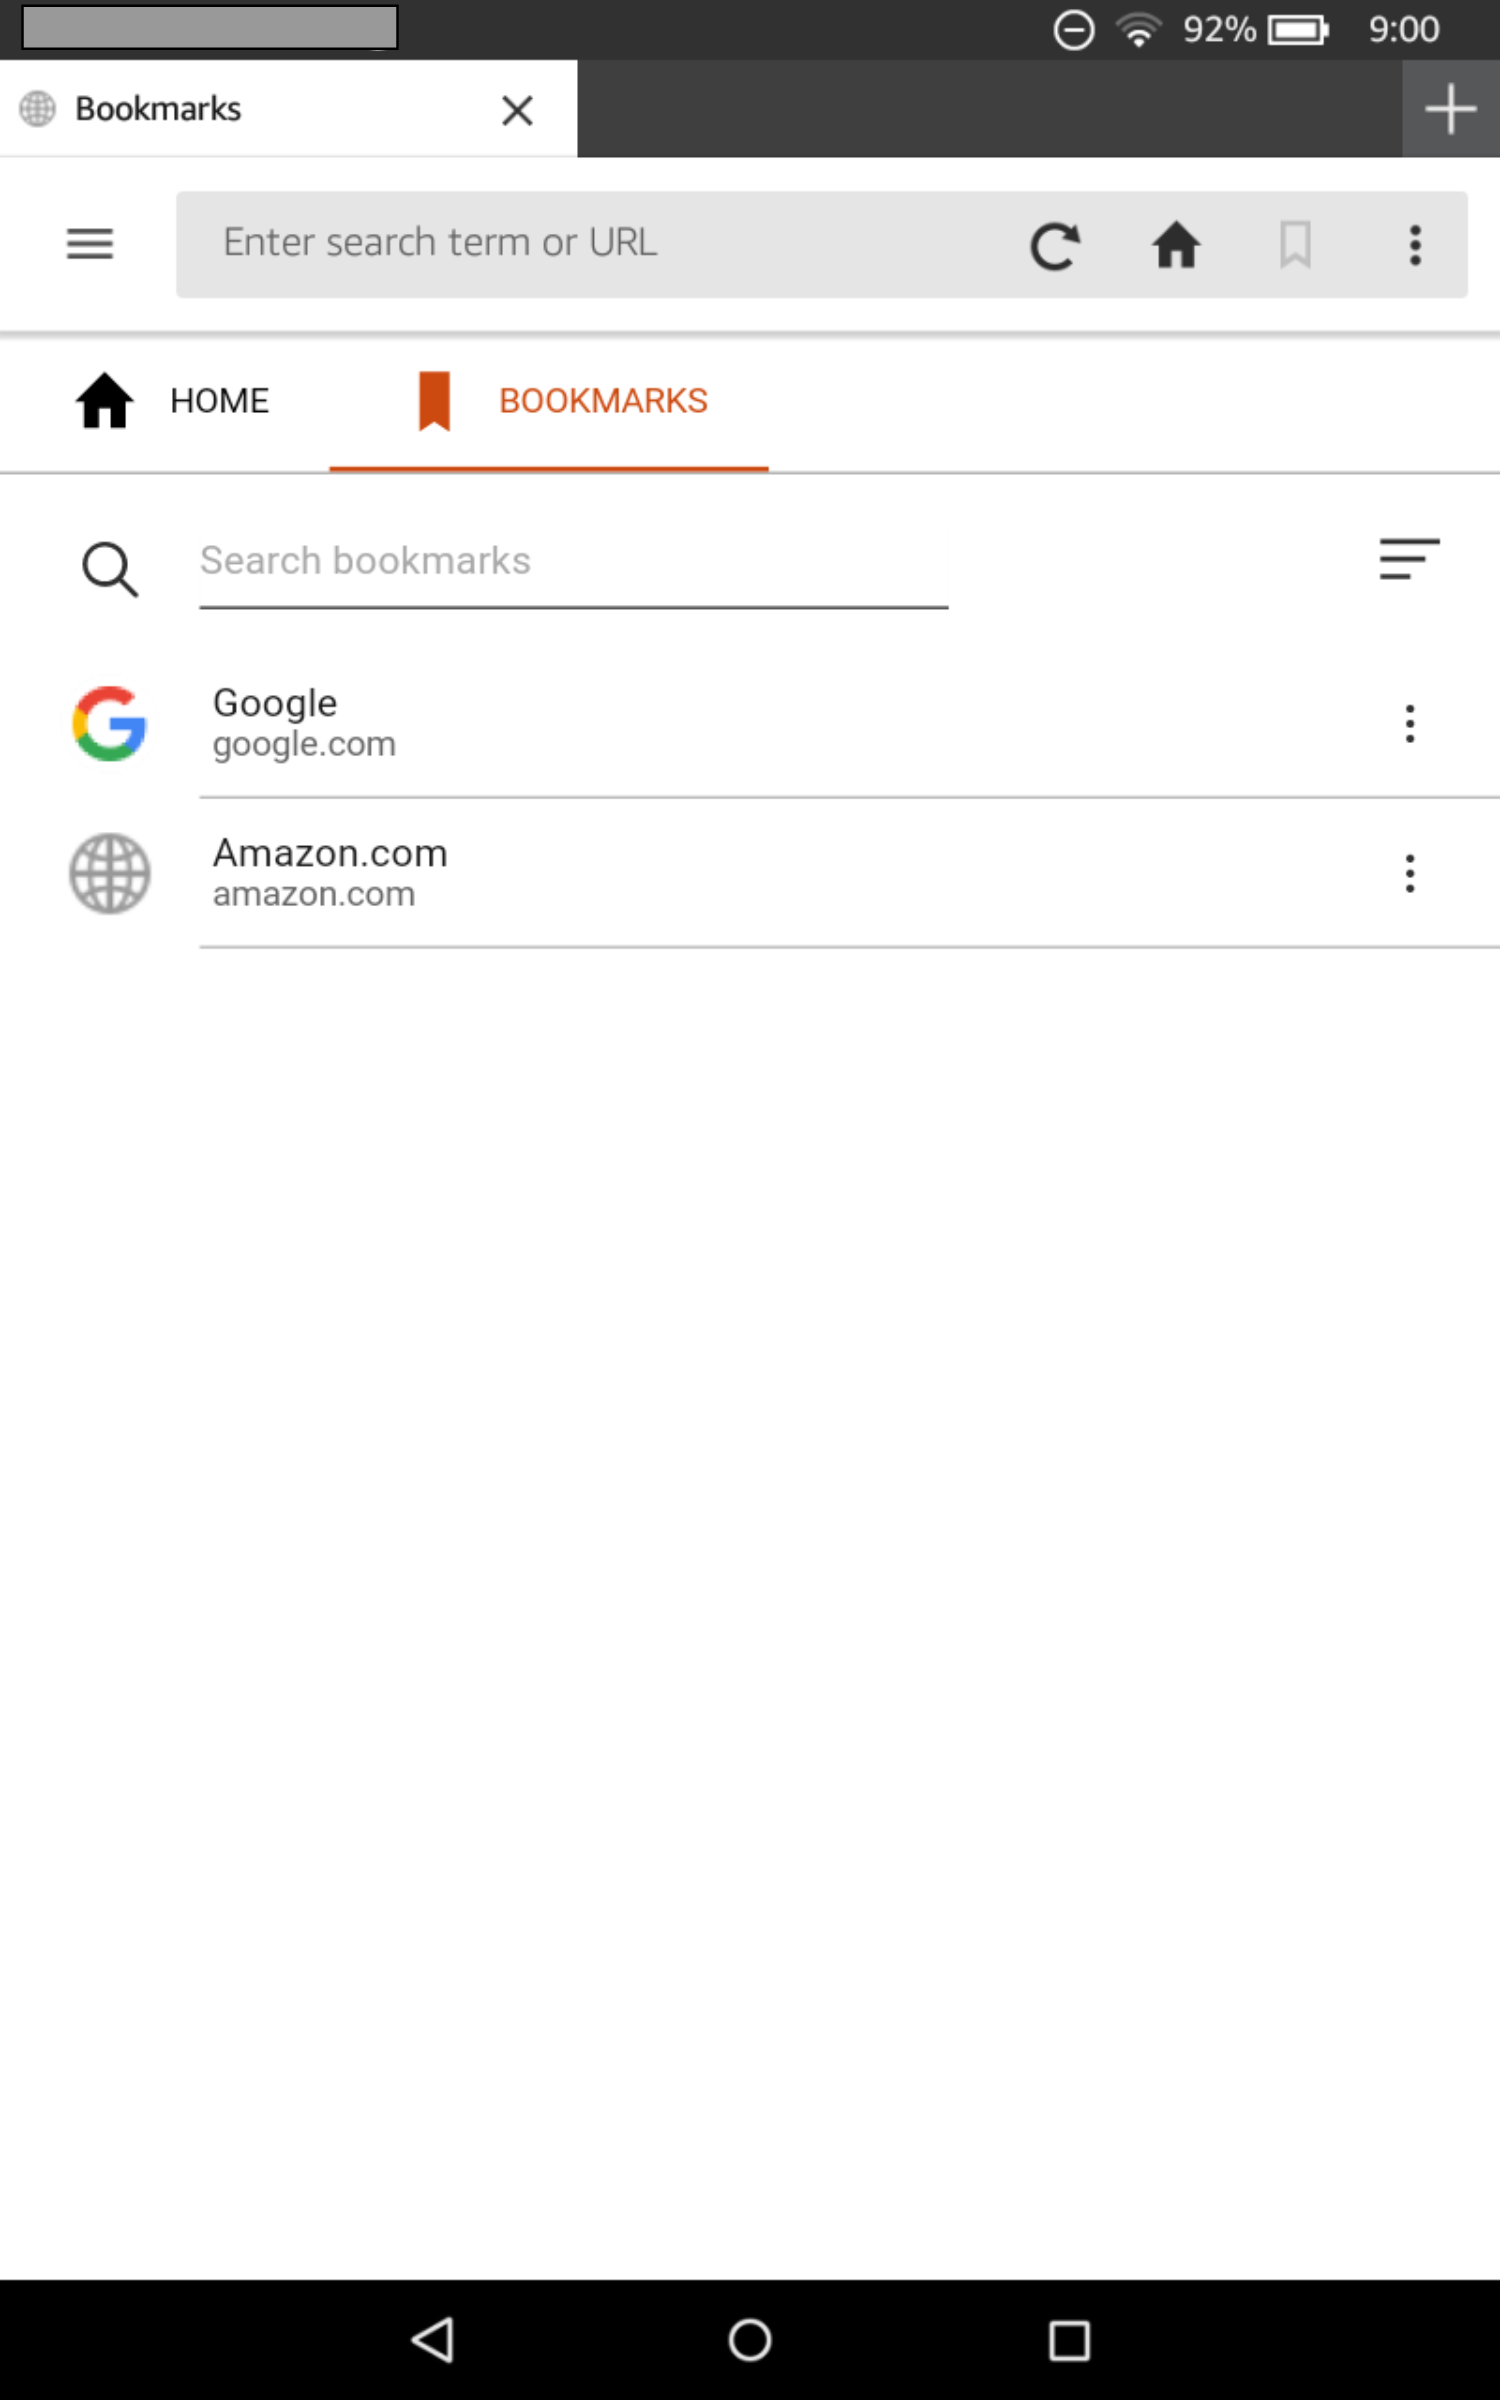
Silk Options > Bookmarks – In the screenshot below, I’ve tapped the Bookmarks shortcut link (notice that it’s highlighted with orange text). When I took this image, I hadn’t yet set any bookmarks. It appears links for your chosen search engine (details on how to change it later on) and Amazon are always here.
After you’ve set a lot of bookmarks, you can use the Search bookmarks field or Sort feature to quickly find the one you want.
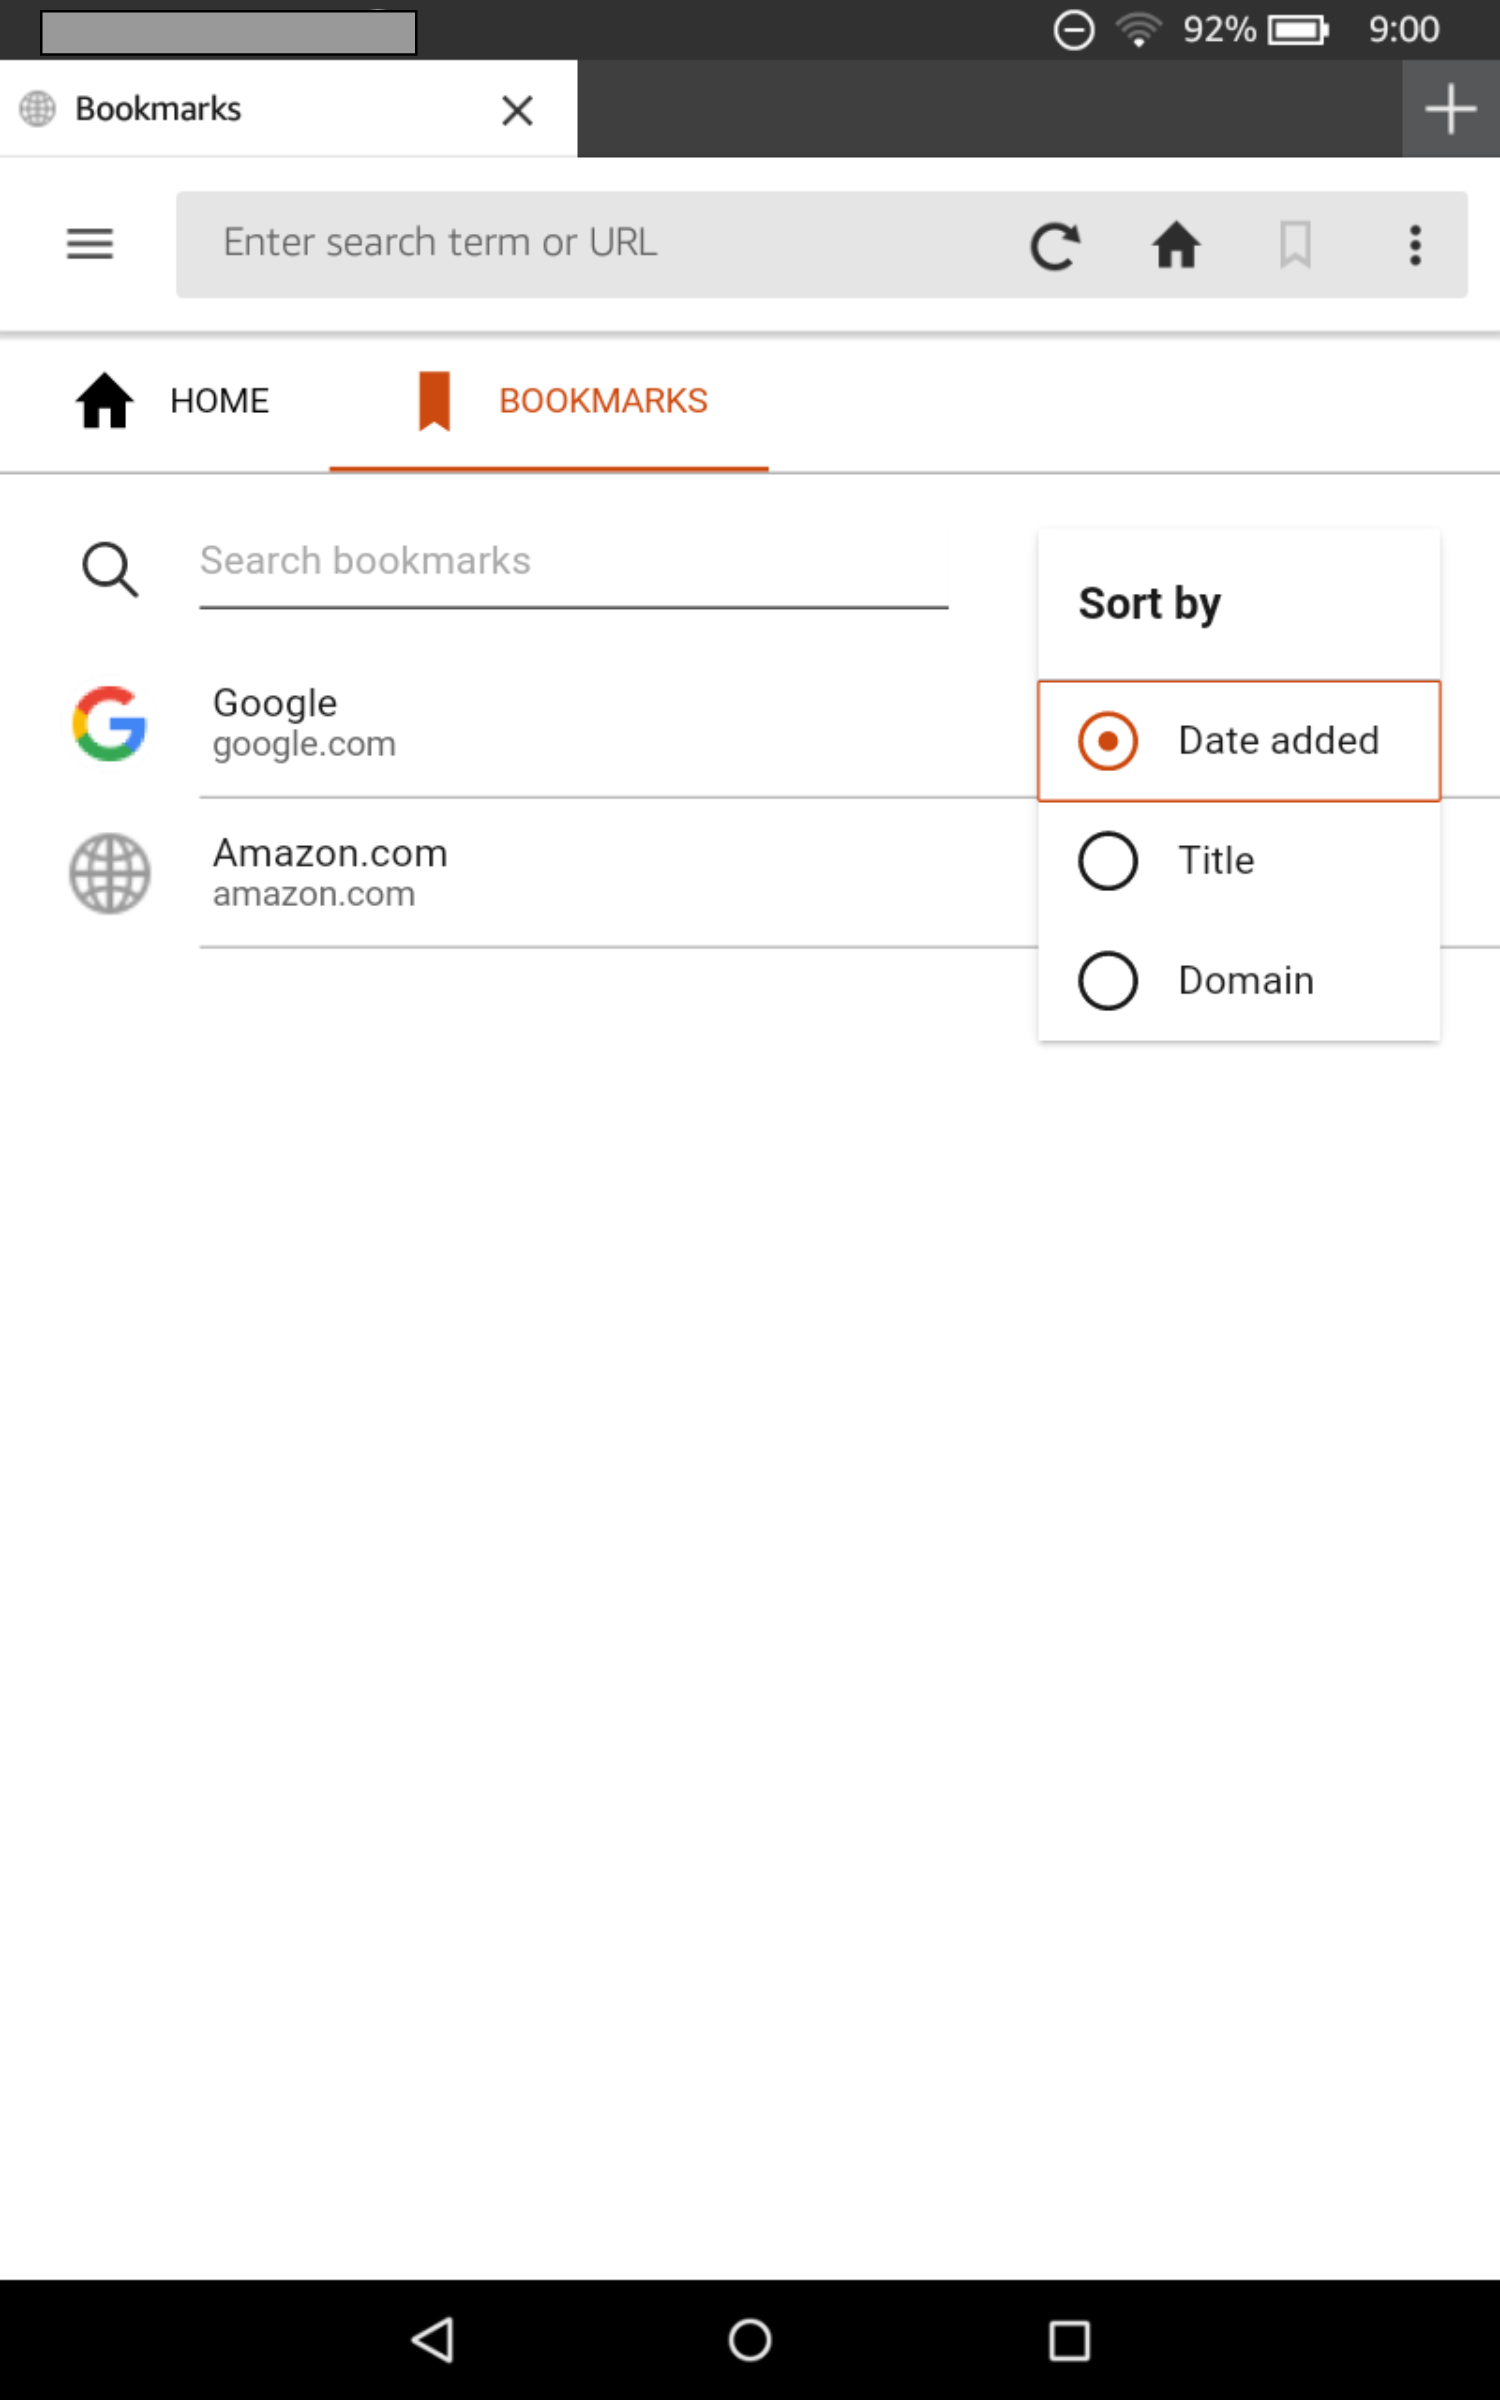
Tap the new Sort icon, to the right of the Search bookmarks field, to sort. It looks like three horizontal lines that decrease in length from top to bottom. This is the new, standard icon for sorting that you’ll find all across the Fire, in all the system menus, wherever a sort option is available.
And here are the sort options available for bookmarks.
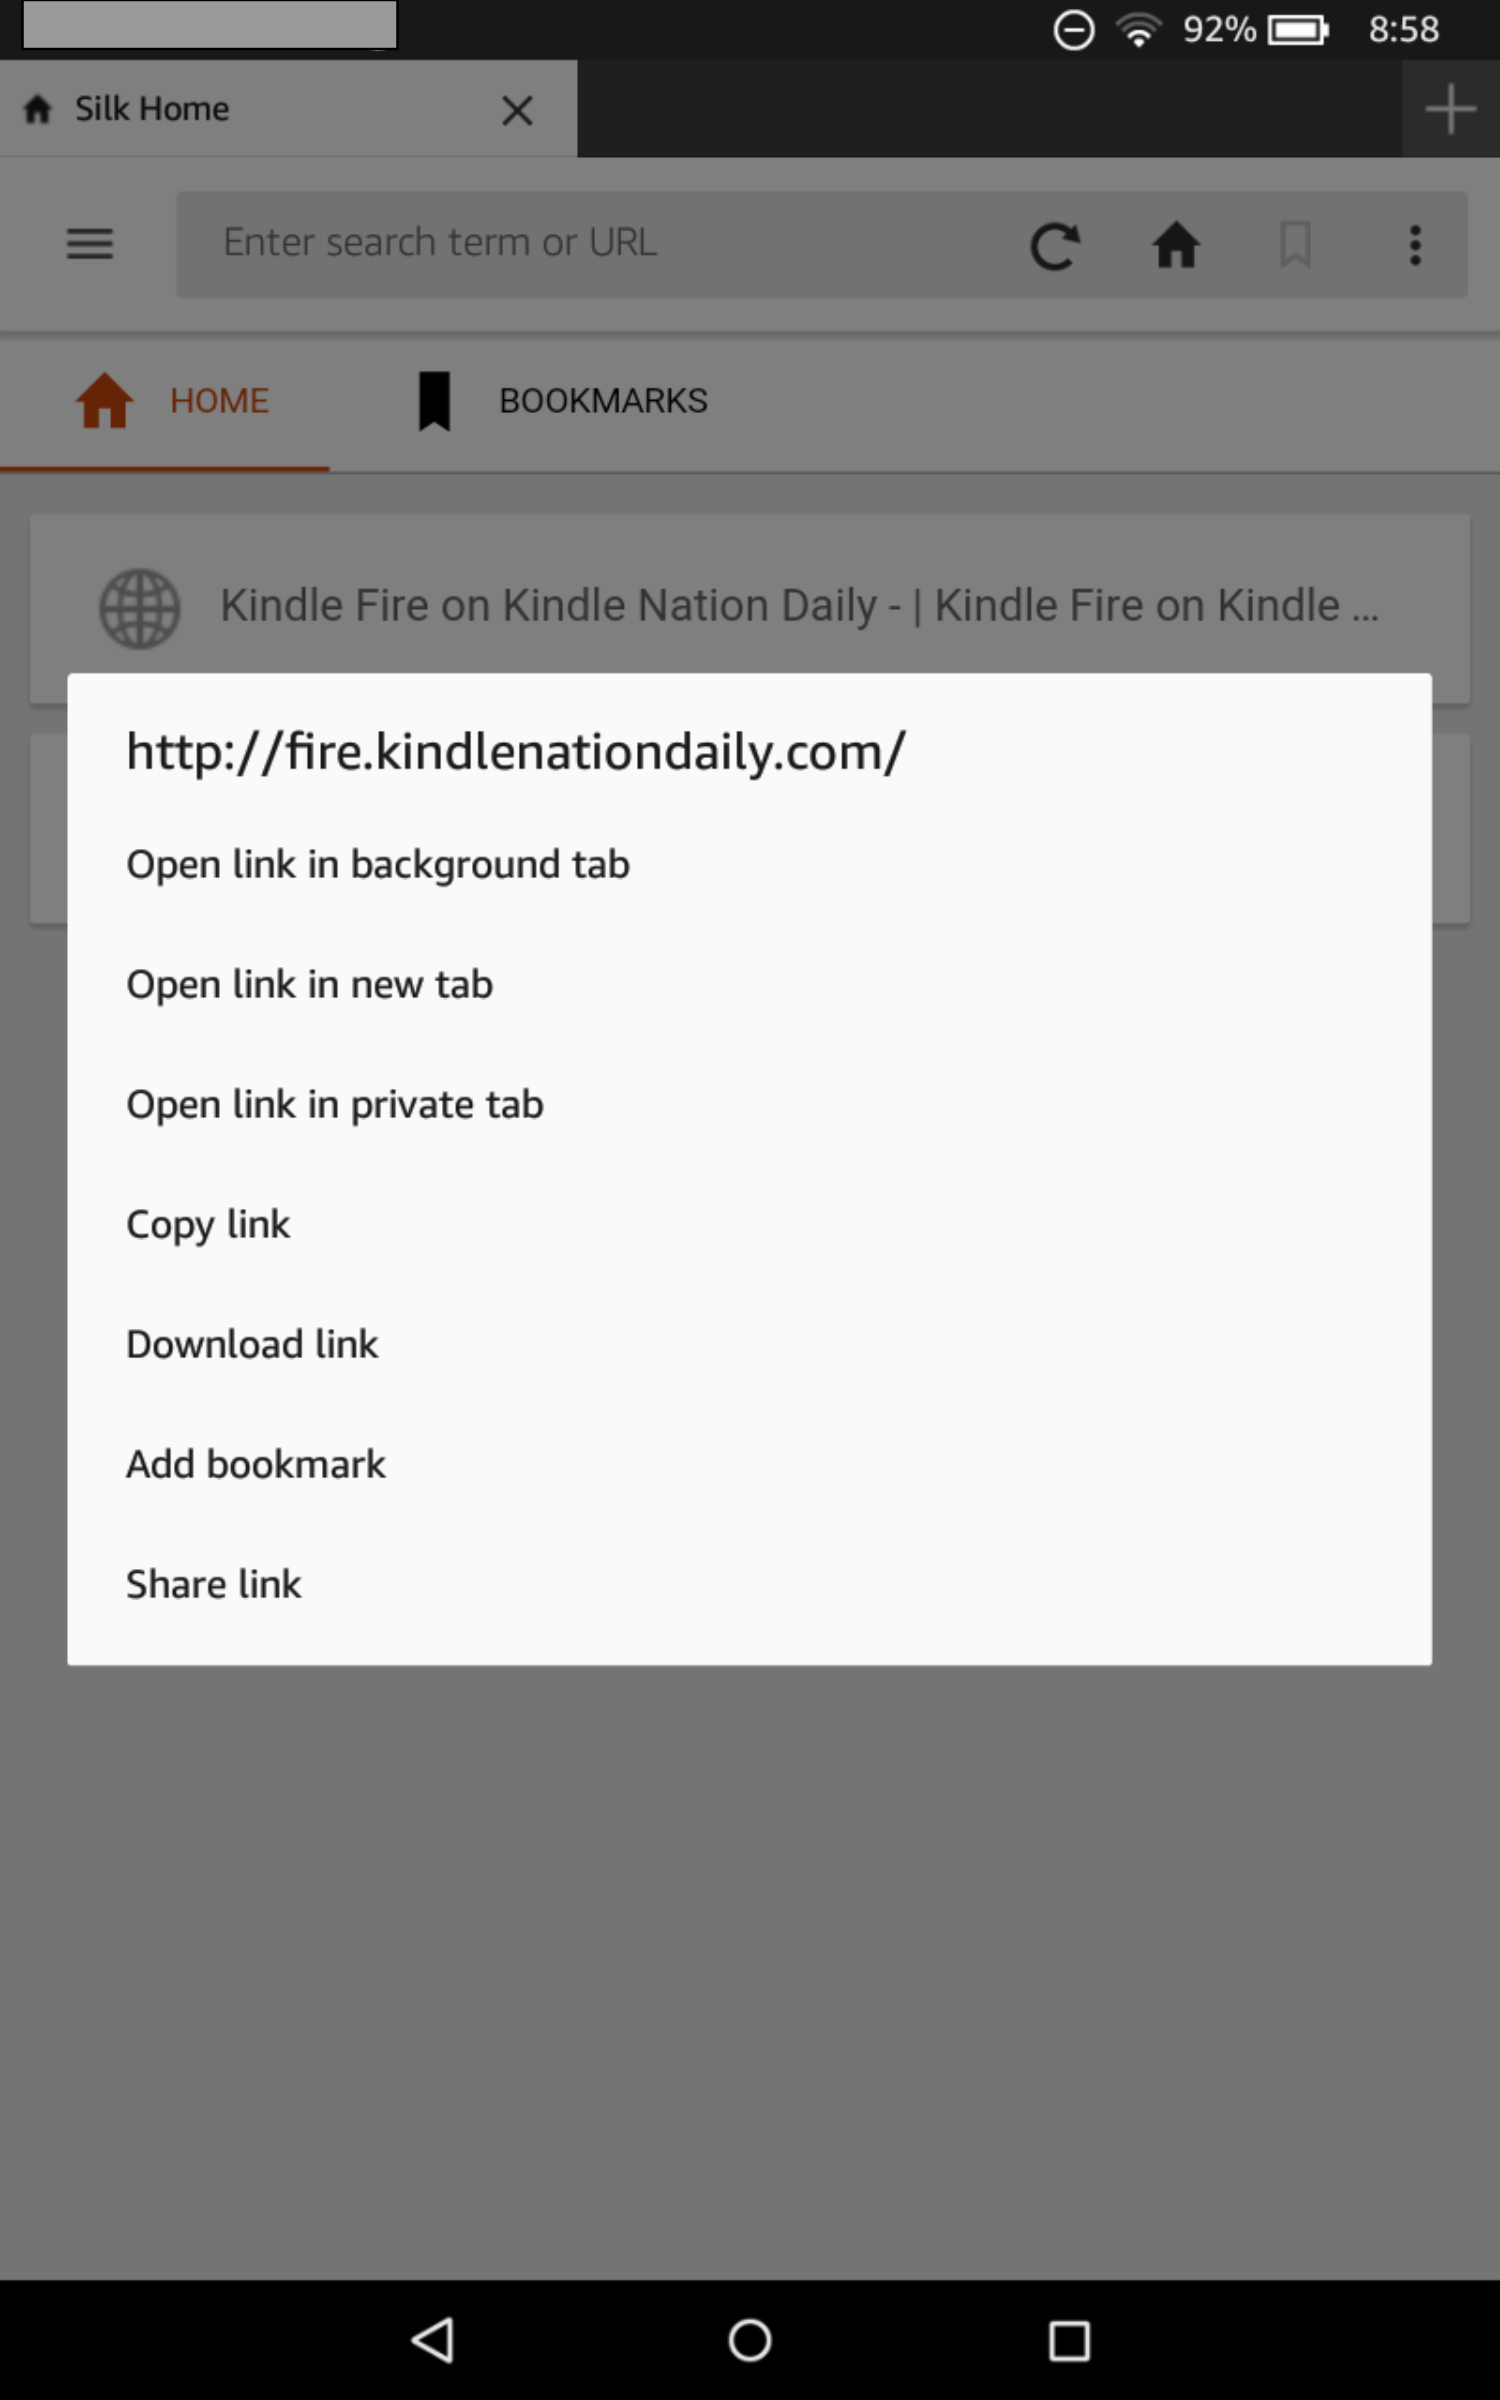
Link Options Popup Menu – This is another new feature. When you long-tap on a link (tap and hold), a Link Options menu pops up. If you just want to load the linked page in the current tab, without opening this Options menu, a regular tap will do.
Silk Options > History – Here’s the History screen. Notice that it opens in a new tab, instead of being offered as a pop-up window or menu. At the time I took this screenshot I hadn’t done any browsing, so it’s blank.
The Search history field lets you search your recent history. Tap in the field to open the on-screen keyboard.
The trashcan icon to the right of the Search history field is used to Clear History.
![]()
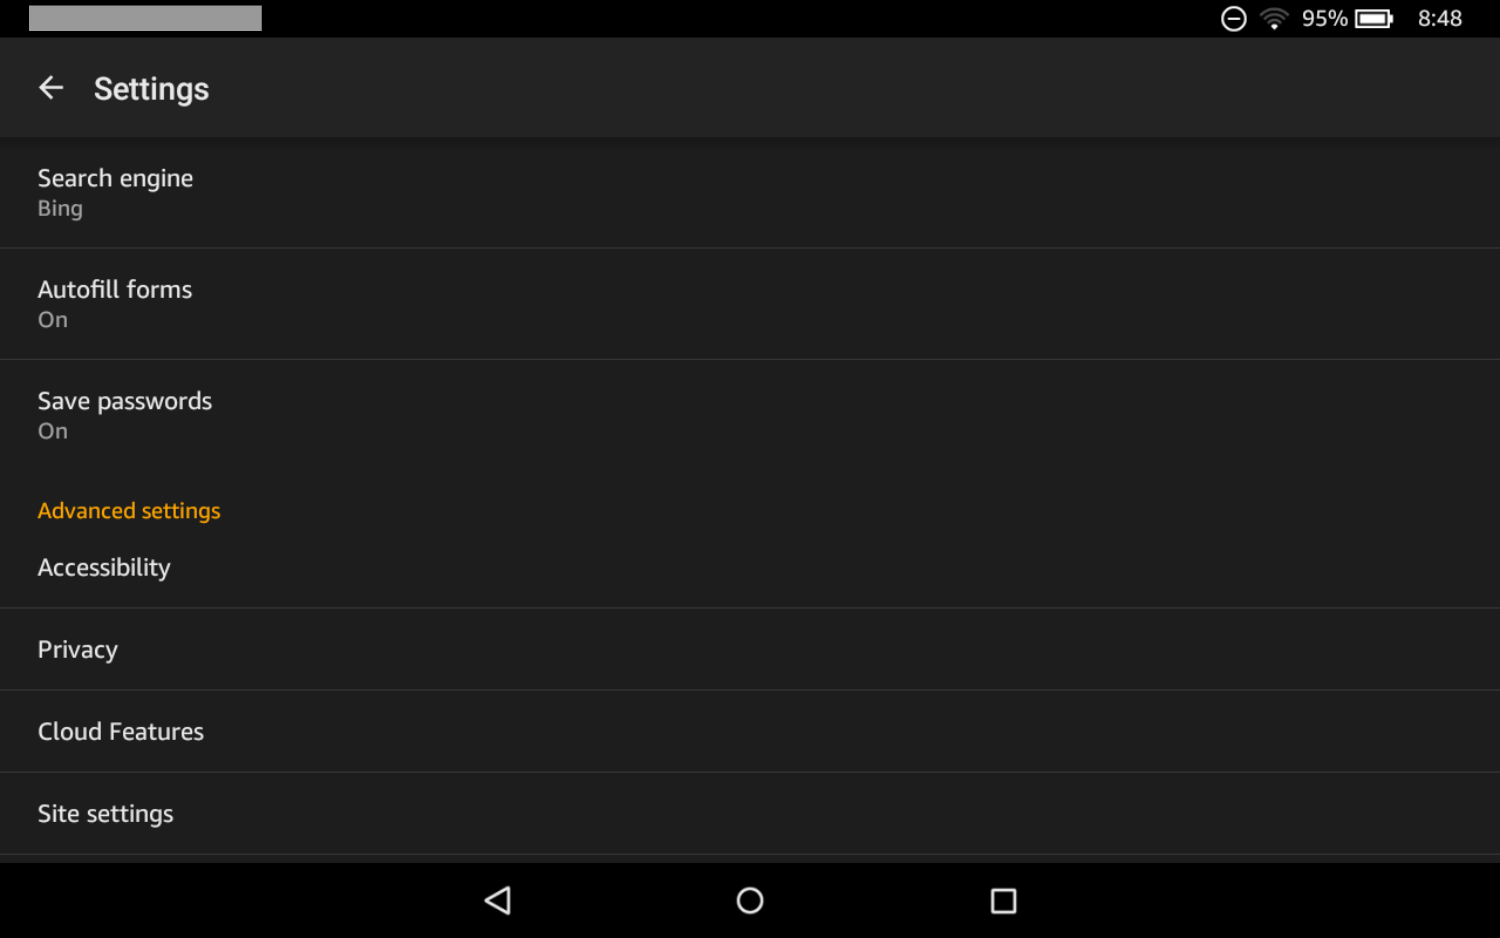
Silk Options > Settings – Here’s the Settings menu you can access via the Silk Options menu shown earlier in this post.
You will probably want to tap each of the first three items in turn, to change their settings.
Silk Options > Settings > Search Engine – Here, you can change your default search engine. As of this writing (10/1/15) the three available options are Bing (Fire default), Google and Yahoo!.

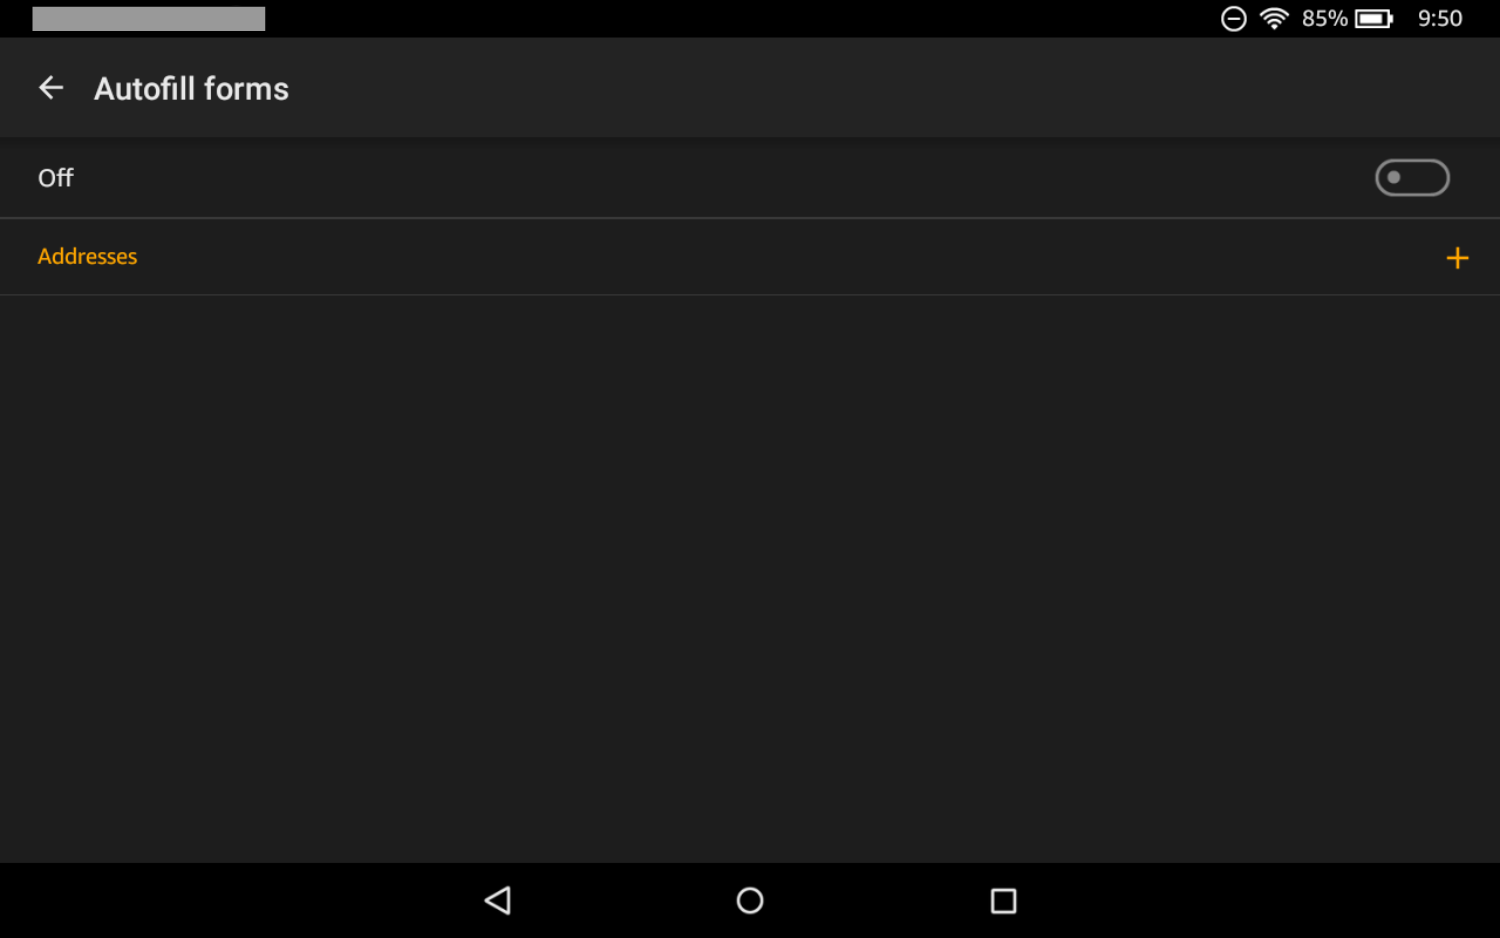
Silk Options > Settings > Autofill Forms – This one is toggled on by default, but since I usually keep it turned off in my desktop browser I’ve turned it off here as well. The Addresses link opens a form where you can add mailing/shipping addresses for easy access when shopping online. I don’t plan to use this feature because, in the event my Fire is ever lost or stolen, any addresses I’ve entered here could be accessible to whoever finds (or stole) my tablet. A home screen lock password is a good security measure, but it’s not foolproof.
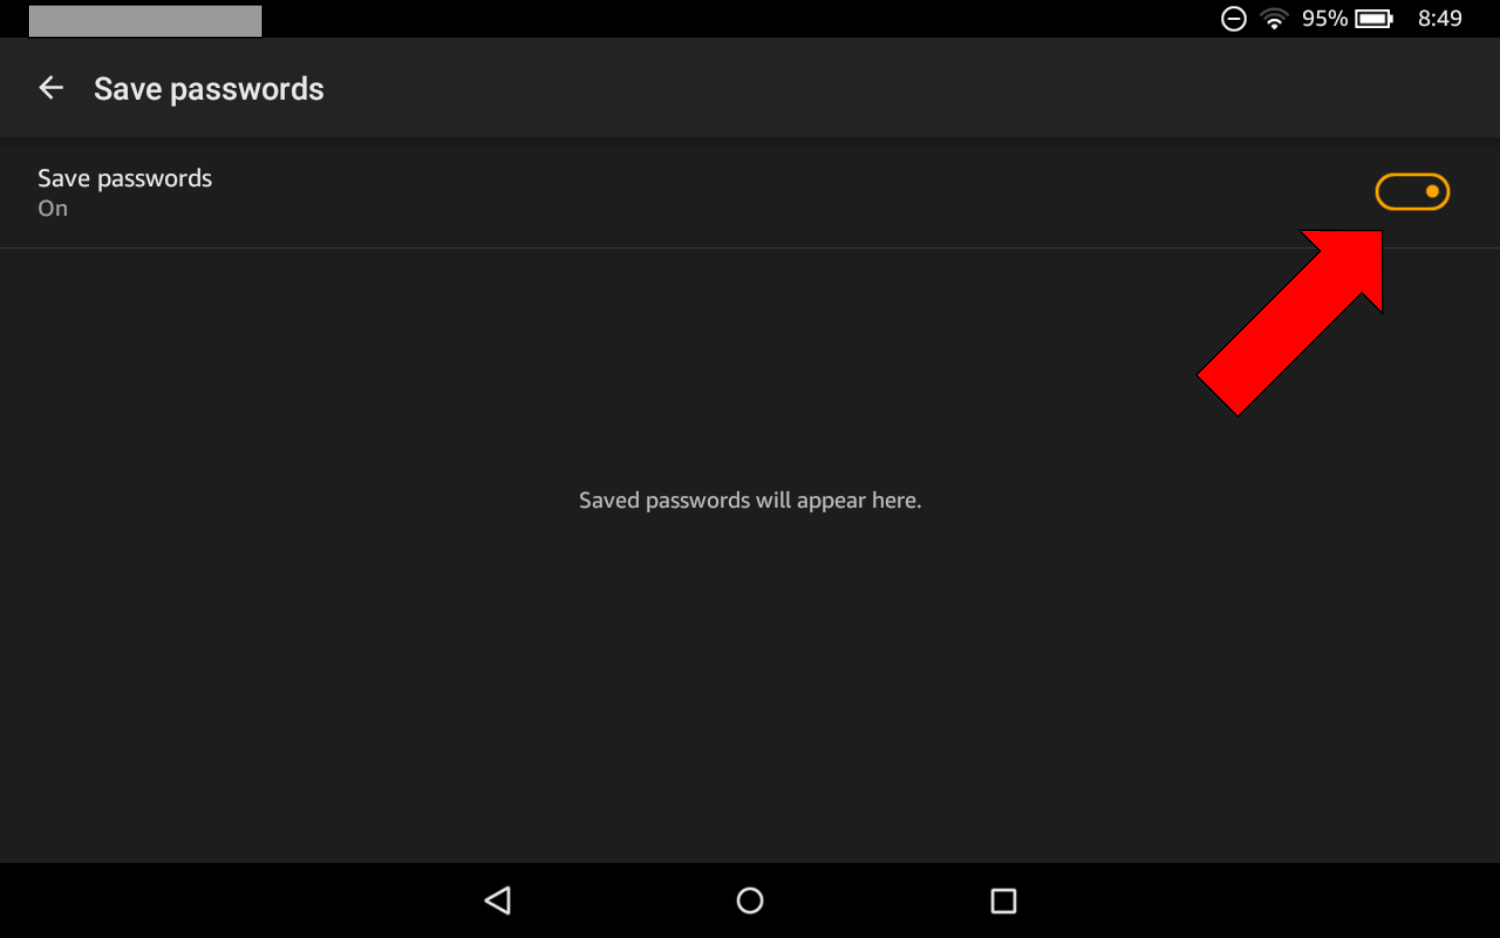
Silk Options > Settings > Save Passwords – This one is also on by default, and I’ve toggled it to OFF on my own Fire due to potential security risk. I leave this option toggled off in my desktop browsers, too.
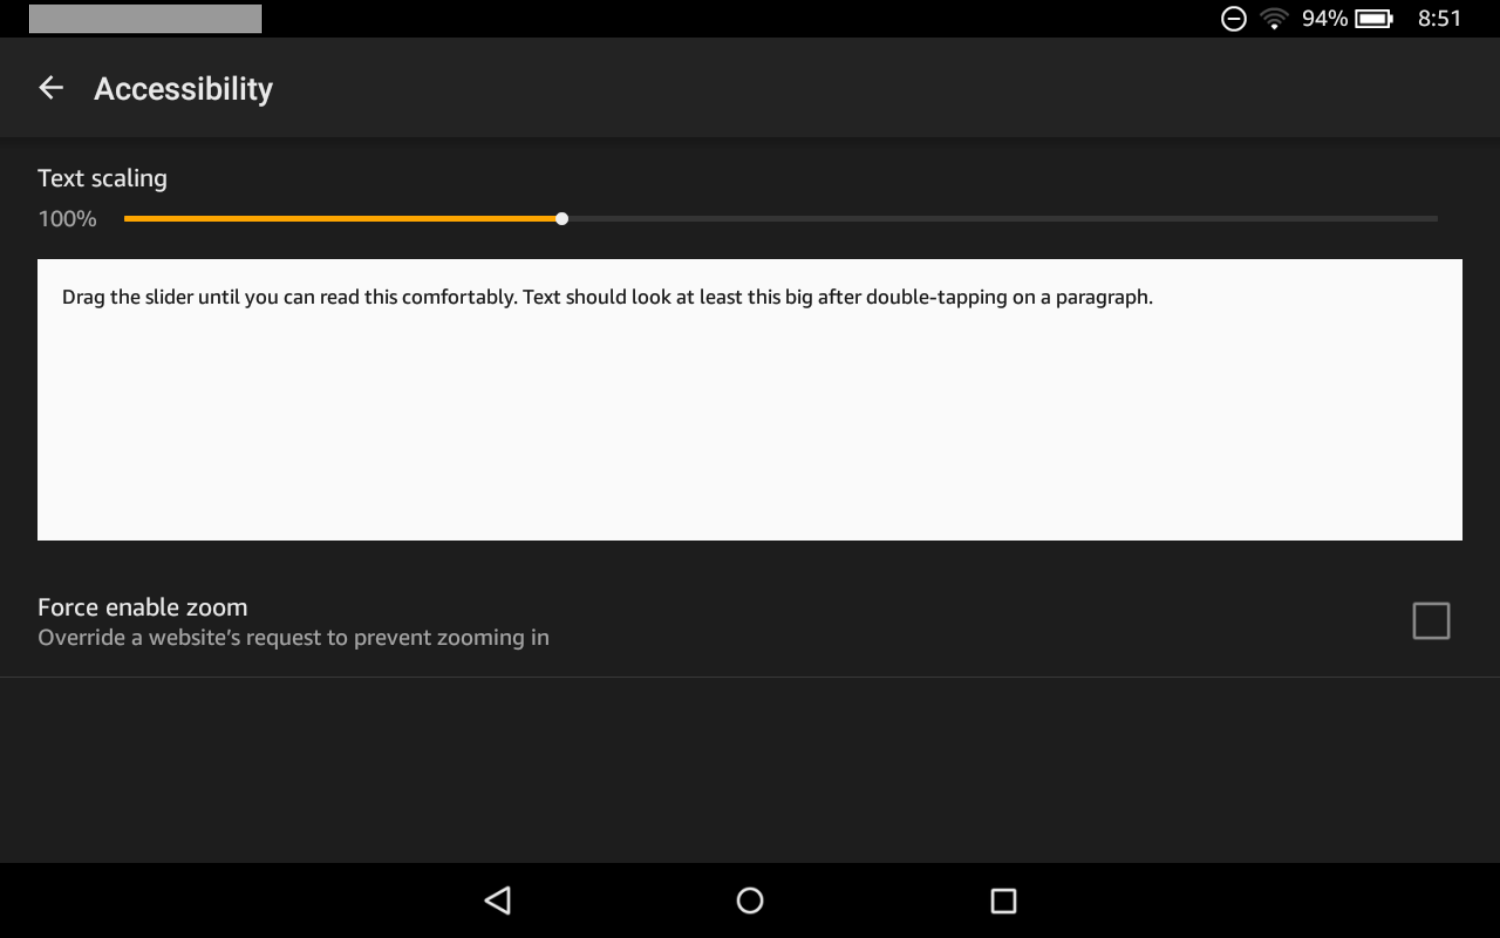
Silk Options > Settings > Accessibility – Here’s where you can adjust the on-screen text size for easier readability. I’ve noticed that the “Reading View” icon (displays the main content from web pages in print-type format, with no sidebars or other features of the original page’s online layout) is missing from the Silk browser URL/Search field, but adjusting this setting can still improve readability.
Silk Options > Settings > Privacy – This is the screen where you can set your Do Not Track preference (it’s toggled ON by default) and Clear Browsing Data.

Silk Options > Settings > Privacy > Clear Browsing Data – Here are the available options when you tap the Clear Browsing Data button. In the example shown, Saved passwords and Autofill data are grayed out because I’ve toggled both of those features to OFF in their individual screens, as described above.
![]()
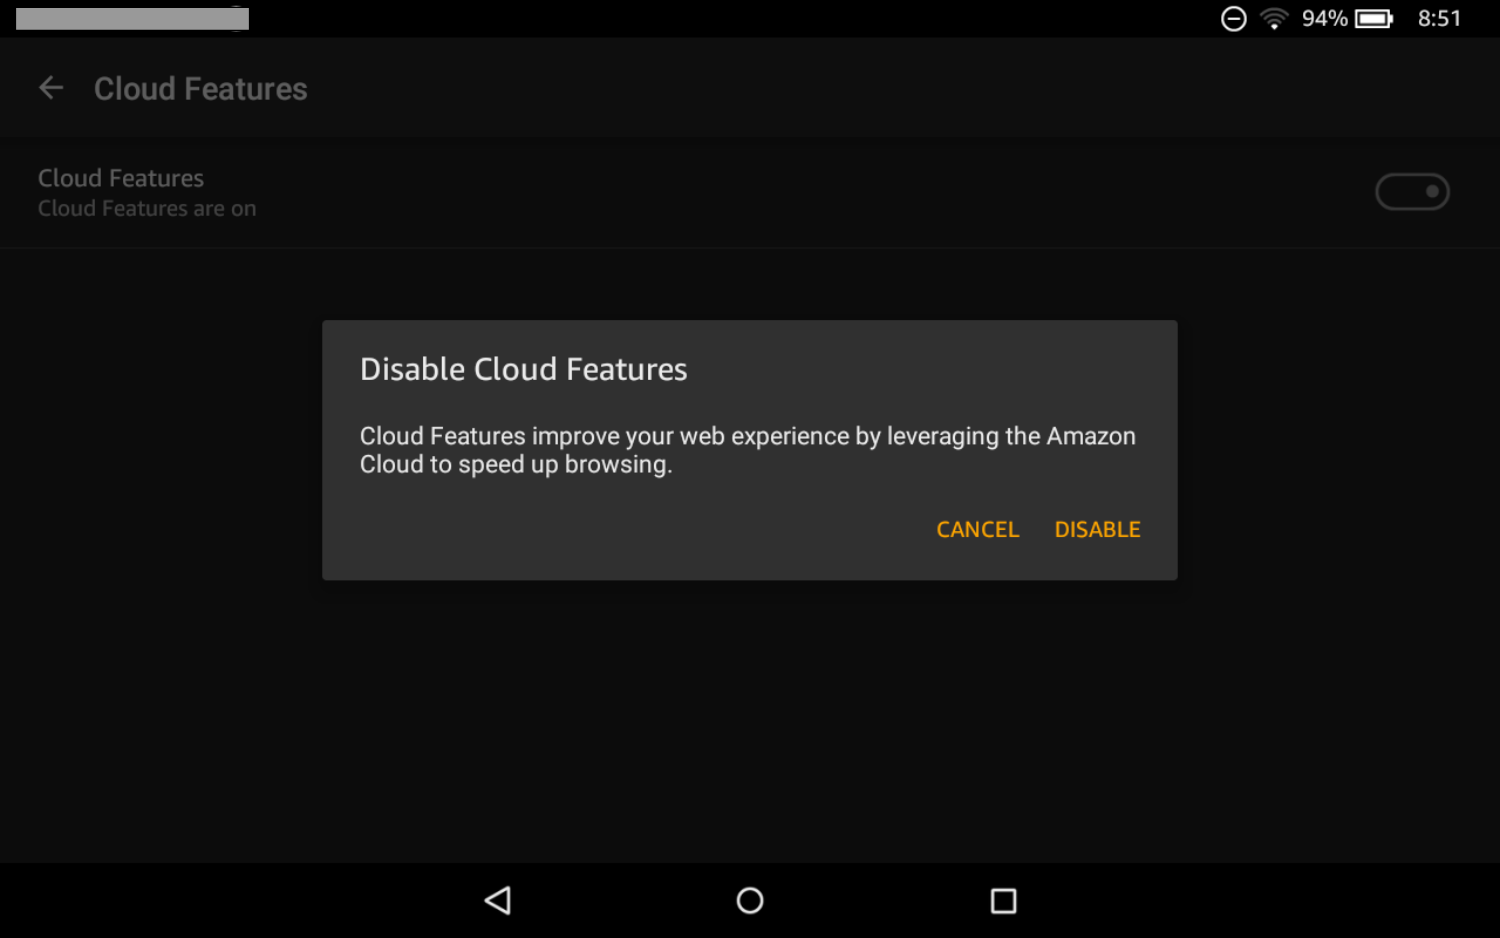
Silk Options > Settings > Cloud Features – I’ve left this one toggled on. Amazon’s Cloud Features allow the Fire to hand off certain processing/search requests to Amazon’s cloud servers (when WiFi is active) for speedier results and better performance. Turning it off may have a negative impact on your Fire’s processing speed for certain tasks.
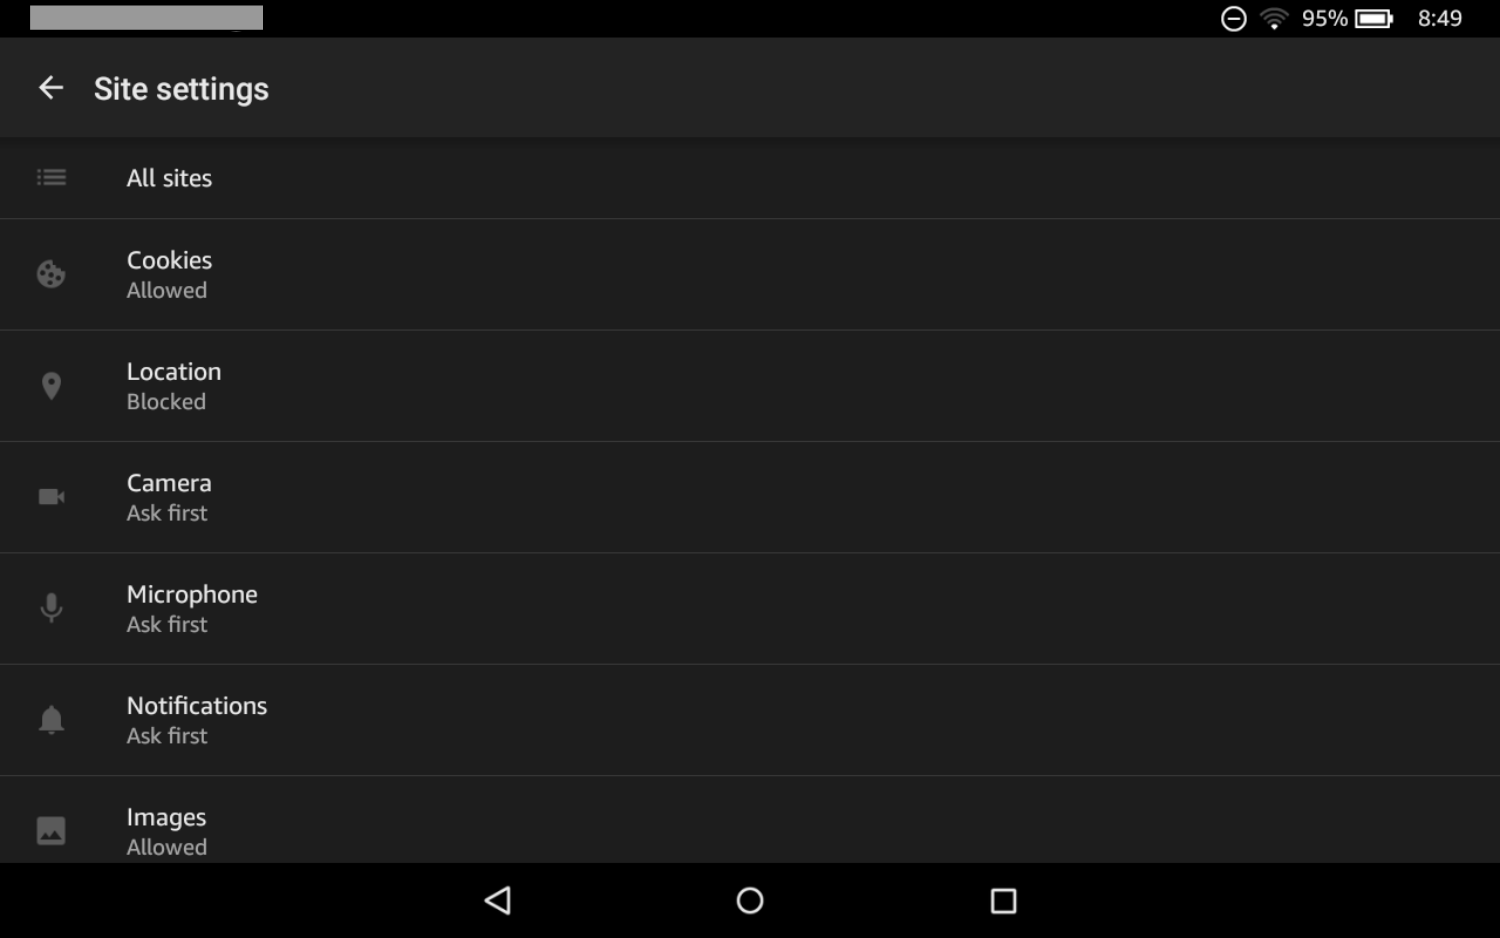
Silk Options > Settings > Site Settings – Here’s where you can customize various settings for all, or individual, sites. The screenshot below shows the default settings. Tap any option to make changes.
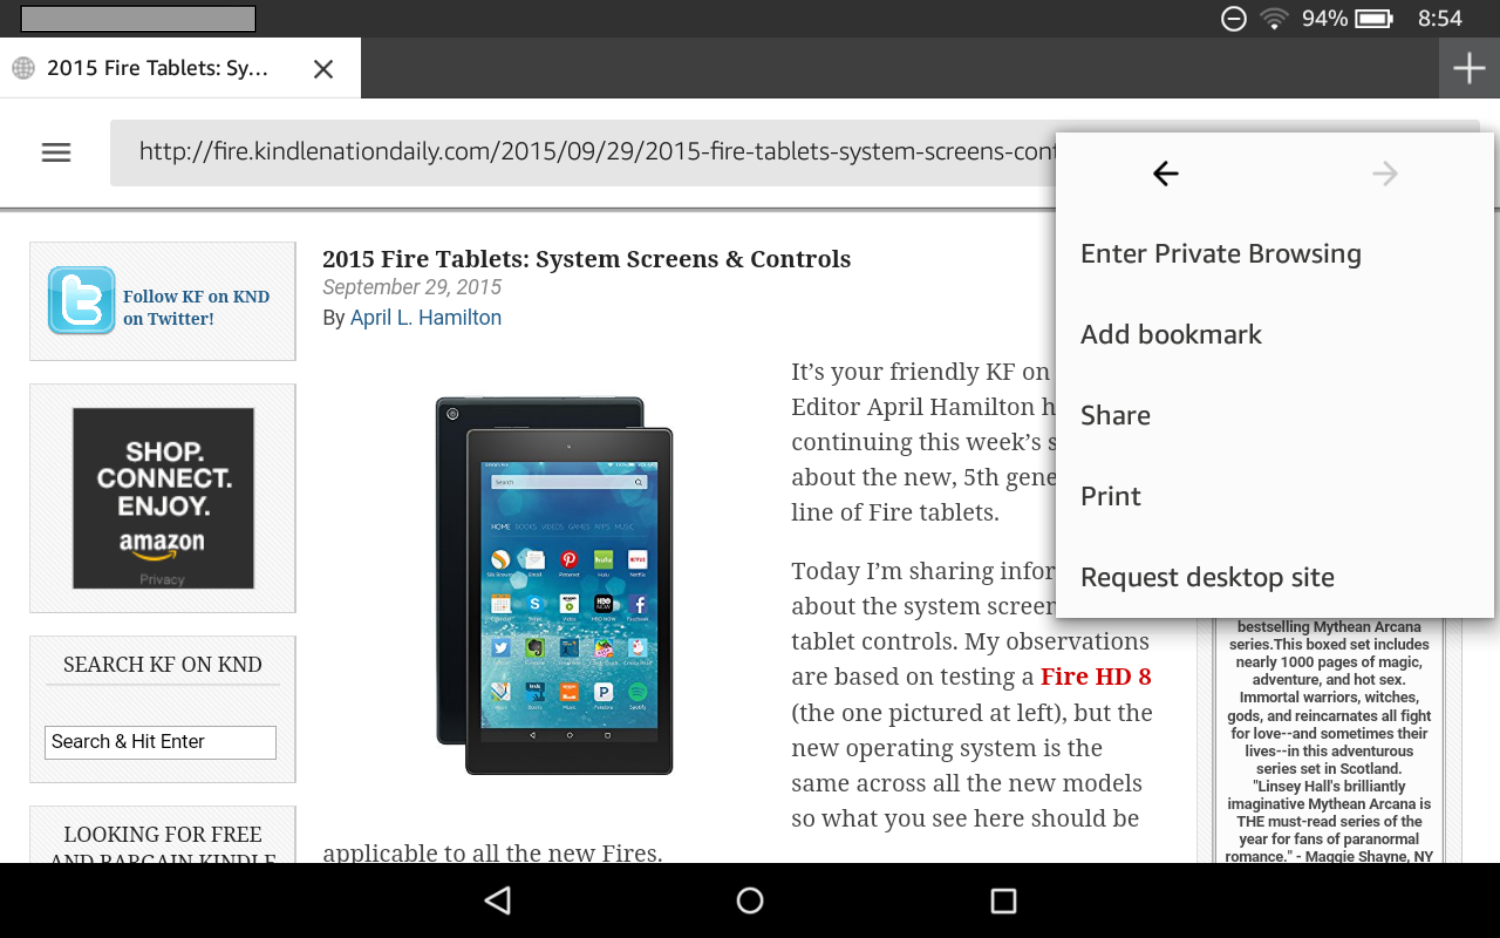
Silk Tab Page Options – Here’s the Page Options menu which is specific to the active tab. You open this menu by tapping the icon with three vertical dots at the far right of the URL/Search bar. It’s covered by the Options popup in this screenshot.
It only has two options, and the back and forward arrows are grayed out, because I haven’t yet loaded any pages in the browser.
Silk Page Options With Page Loaded – Now that I’ve loaded a page, the full Page Options menu is loaded. The Back arrow is enabled, but the forward arrow is still grayed out because I’ve only loaded one page in this tab so far.
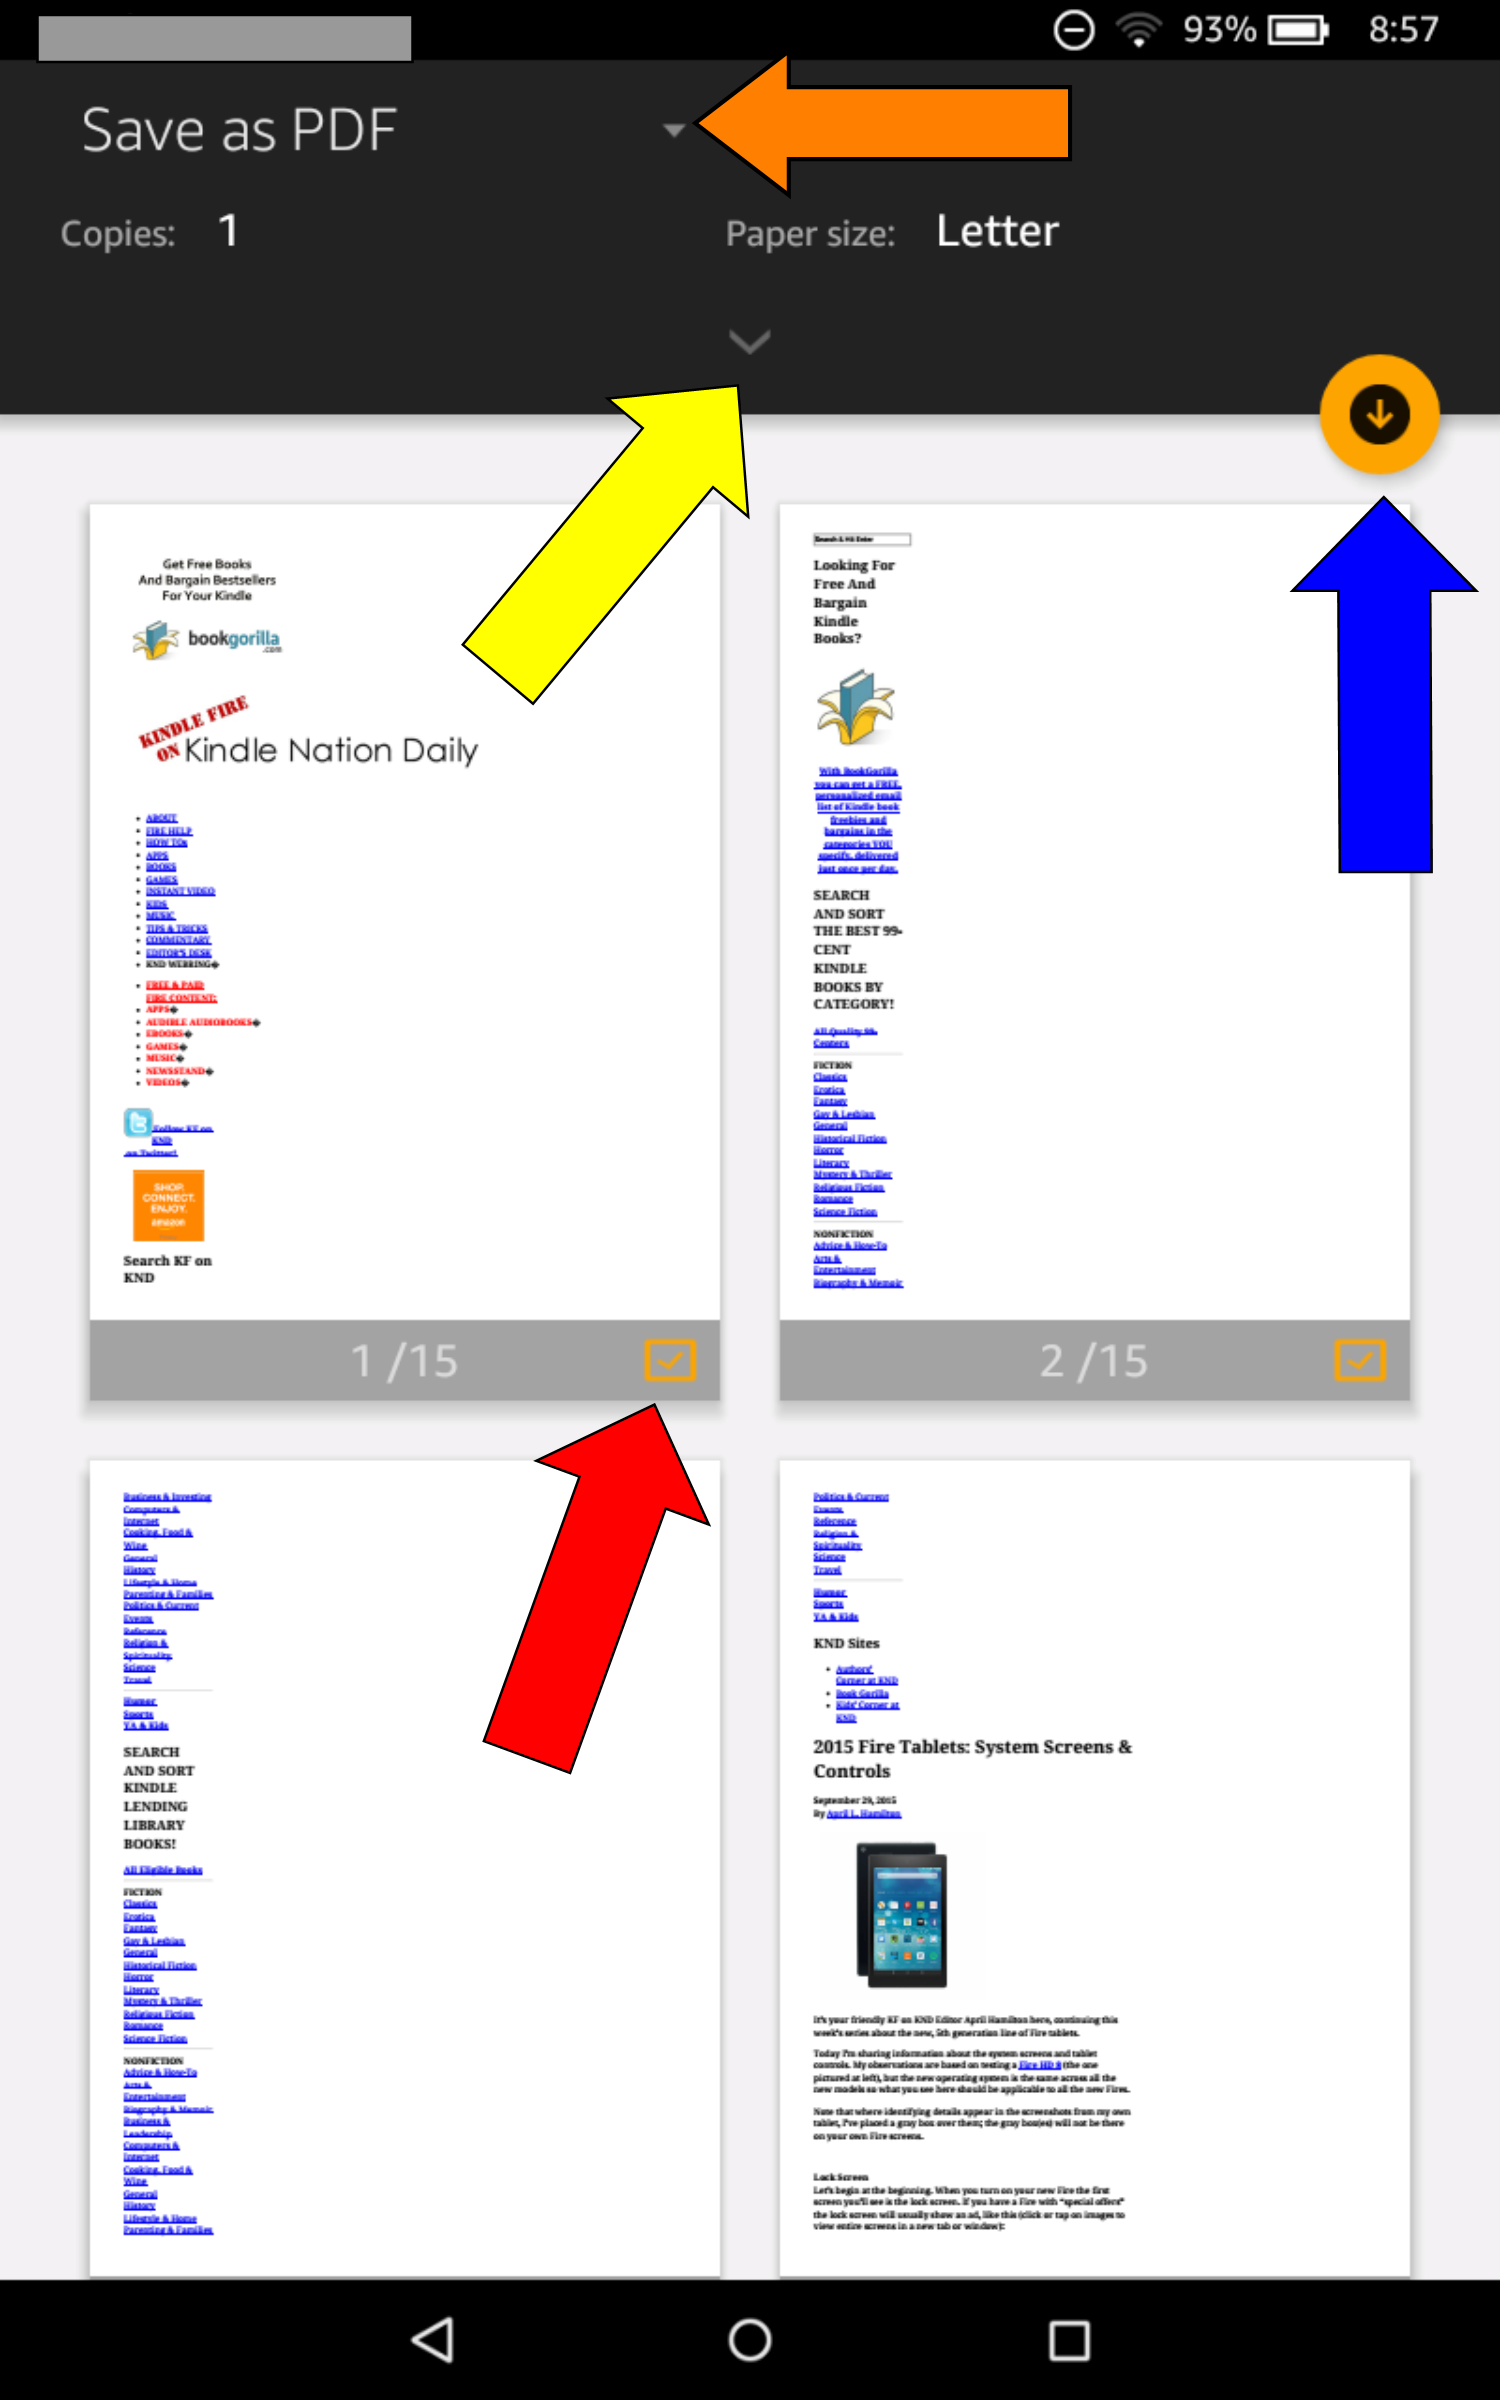
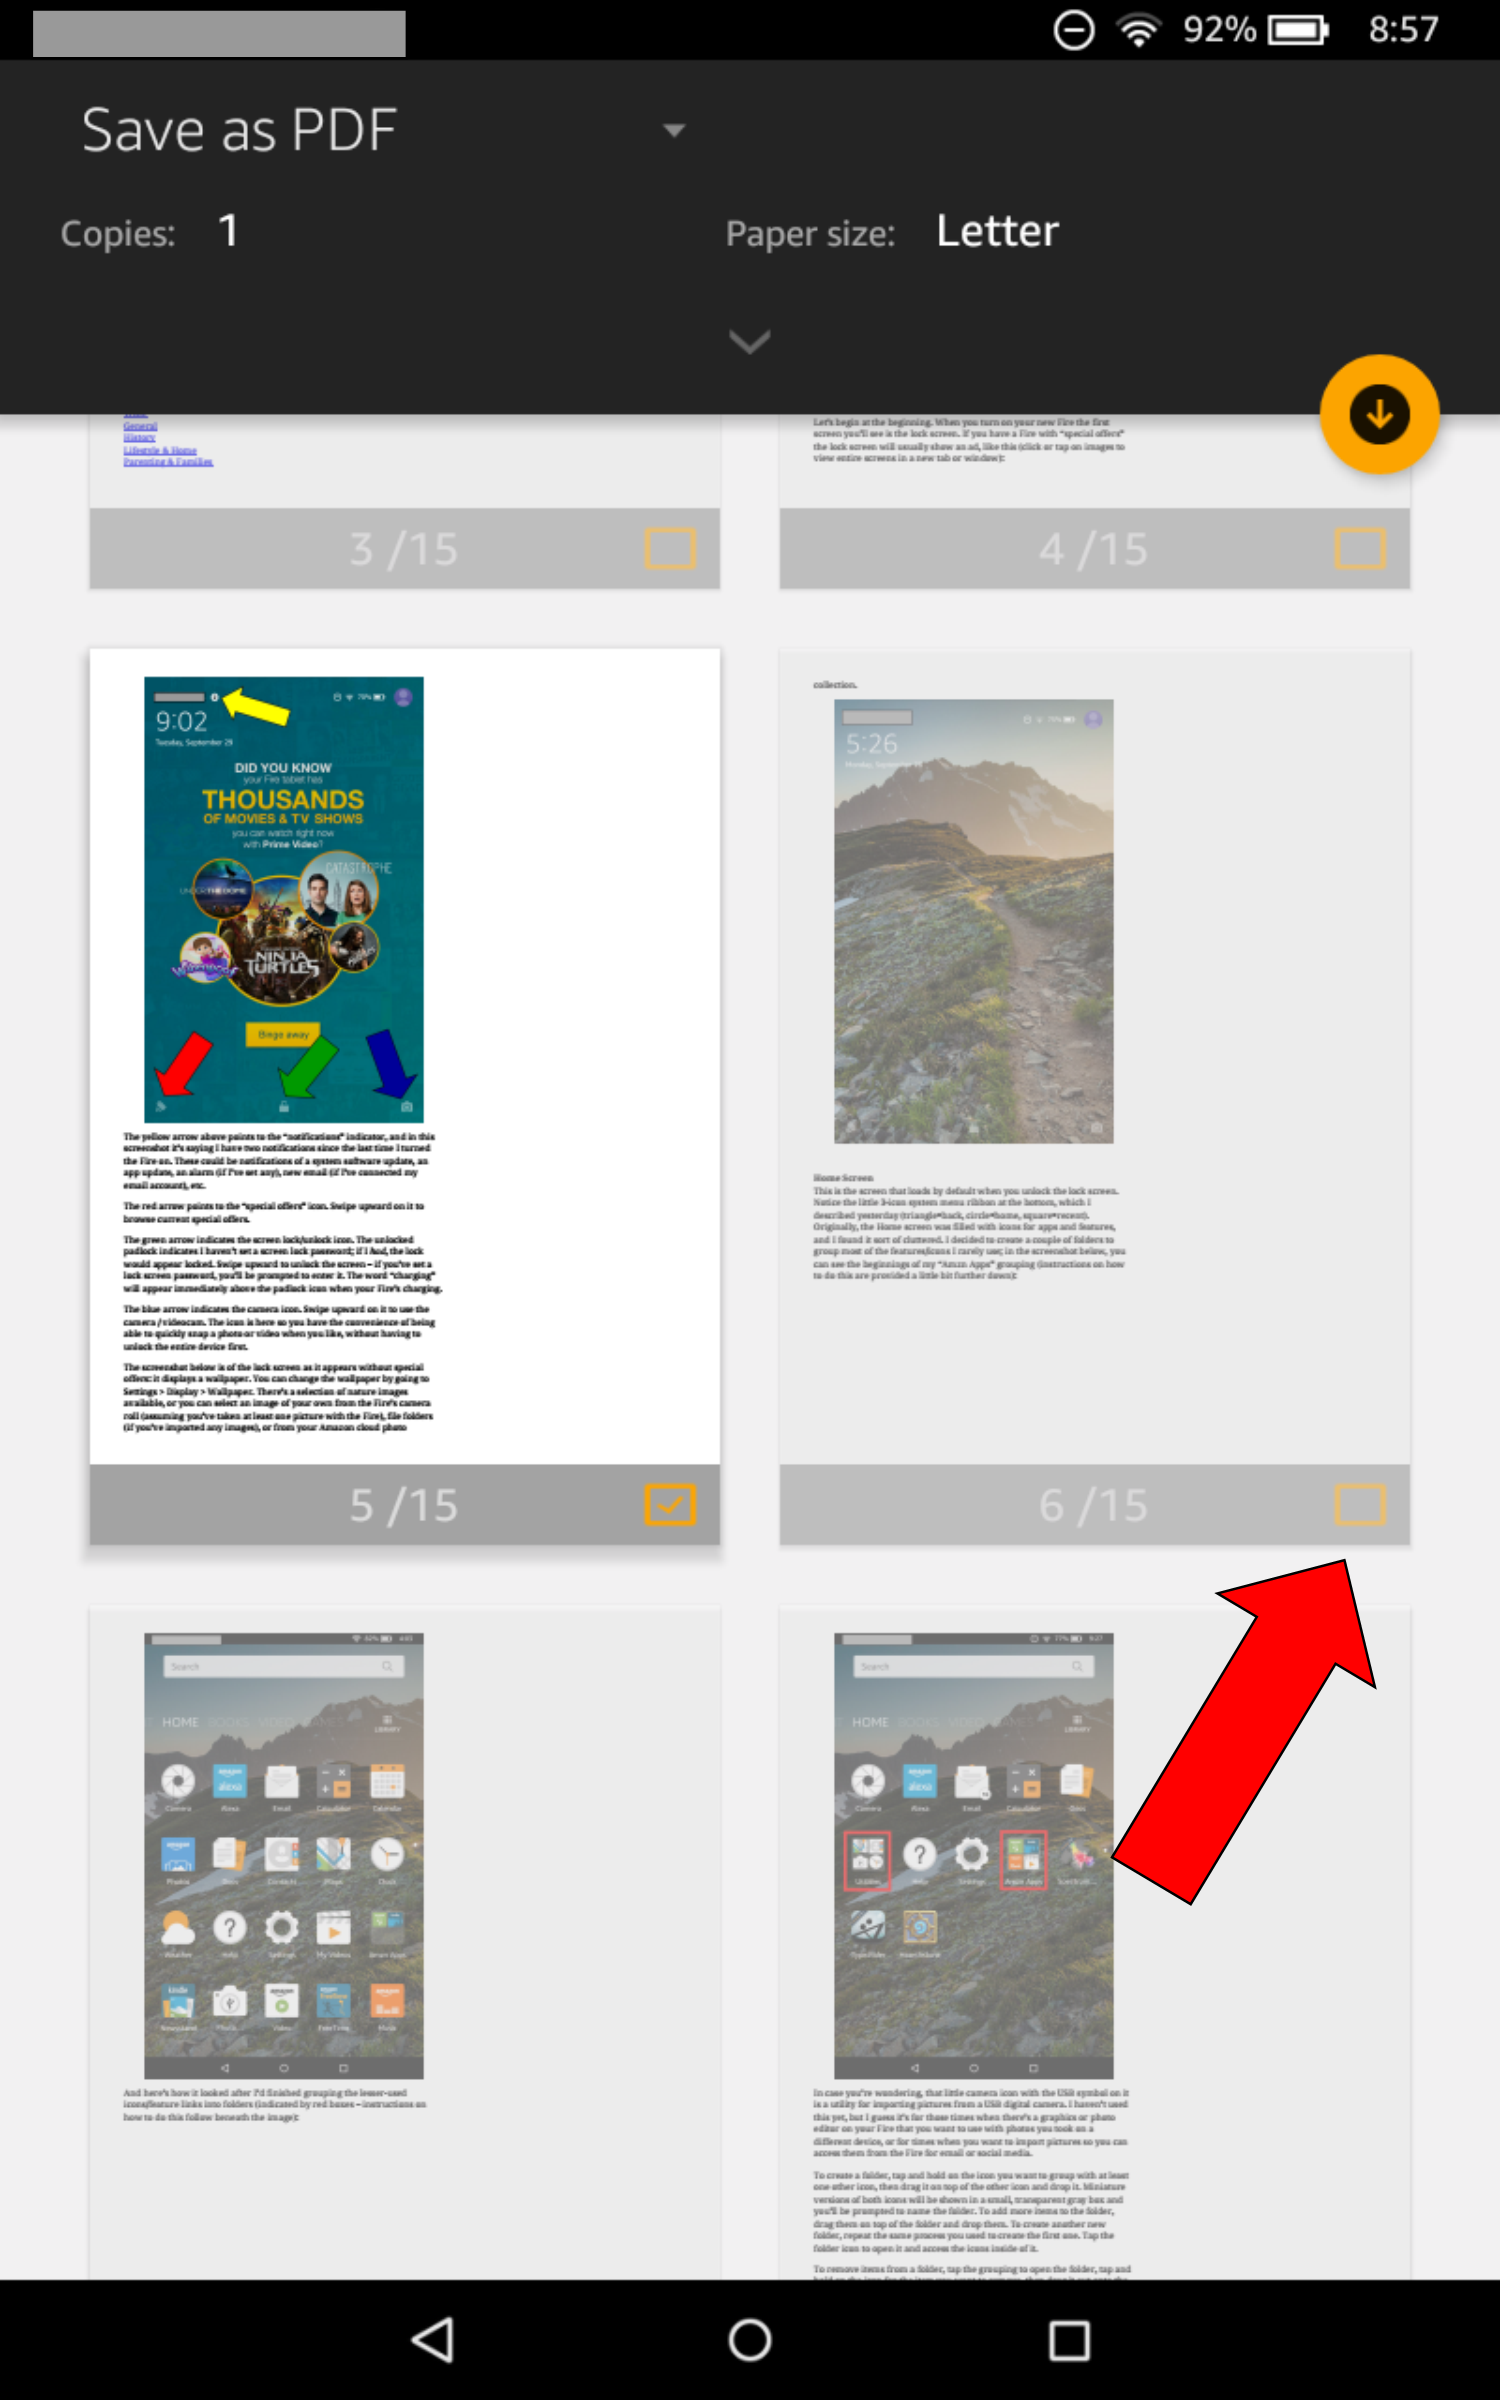
Silk Tab Page Options > Print – The screenshot below shows the default Print screen.
Save as PDF is available by default, but you can also tap the downward-pointing triangle (left of orange arrow in screenshot) to add or view available printers. If WiFi is active and there’s an available printer on the WiFi network, in most cases the Fire will find it and give you the option to add it as a Printer option here. I say “most cases” because there will always be those exceptional cases where a specific model of printer isn’t compatible, but I had no difficulty adding Canon and Epson inkjet printers.
The yellow arrow in the screenshot indicates the icon to open the Print Options/Settings menu. More detail on that in the next section.
The blue arrow indicates the download/print icon, which you’ll use to print pages or download PDFs after you’ve set your desired print options. Here, I’ve yet to add any printers so only the download arrow icon is shown.
Silk Tab Page Options > Print Options/Settings – This works much the same as any printer options/settings menu you’ve used in the past.

Silk Tab Page Options > Print > Select Pages – When you print a web page it’s typical to have a lot of stuff at the beginning and end of the file that you don’t really want in your printed or PDF copy (e.g., menu bars, comments, etc.).
In the print screen, every page that will be included in the print job or PDF file is shown in preview mode, and you can tap the Select box beneath each page (red arrow below) to include or exclude that page in the print job. When you tap to deselect, the preview version of the page is grayed out to indicate it will not be included in the print job / PDF file
Silk Tab Page Options > Print > Confirm Print/Save – This is the print/PDF confirmation page. Notice that the text here tells you exactly where PDFs will be saved and how to find them in the future.

Finally, here’s a screenshot of this site as it appears when loaded in the Silk browser.
Next Up: Content Menus & Features – Books
* * *
Tech Tip of the Week: Be Reasonable About The Limitations Of Tech
* * *