
It’s your friendly KF on KND Editor April Hamilton here, continuing this week’s series about the new, 5th generation line of Fire tablets.
Today I’m sharing information about the camera screens, options and controls. My observations are based on testing a Fire HD 8 (the one pictured at left), but the new operating system is the same across all the new models so what you see here should be applicable to all the new Fires.
Where identifying details appear in the screenshots from my own tablet, I’ve placed a gray box over them; the gray box(es) will not be there on your own Fire screens.
NOTE: I’d intended to share features of both the Camera and Silk Browser today, but due to some technical difficulties I’ve been unable to upload the Silk Browser screenshots so I’ll have to try tackling Silk tomorrow.
Camera Screen
There’s really only one screen to share for this. In the screenshot below, I’ve opened the Options/Settings menu by tapping on the little gear icon at the upper right corner. Tap or click on images to view full screens in a new tab or window.
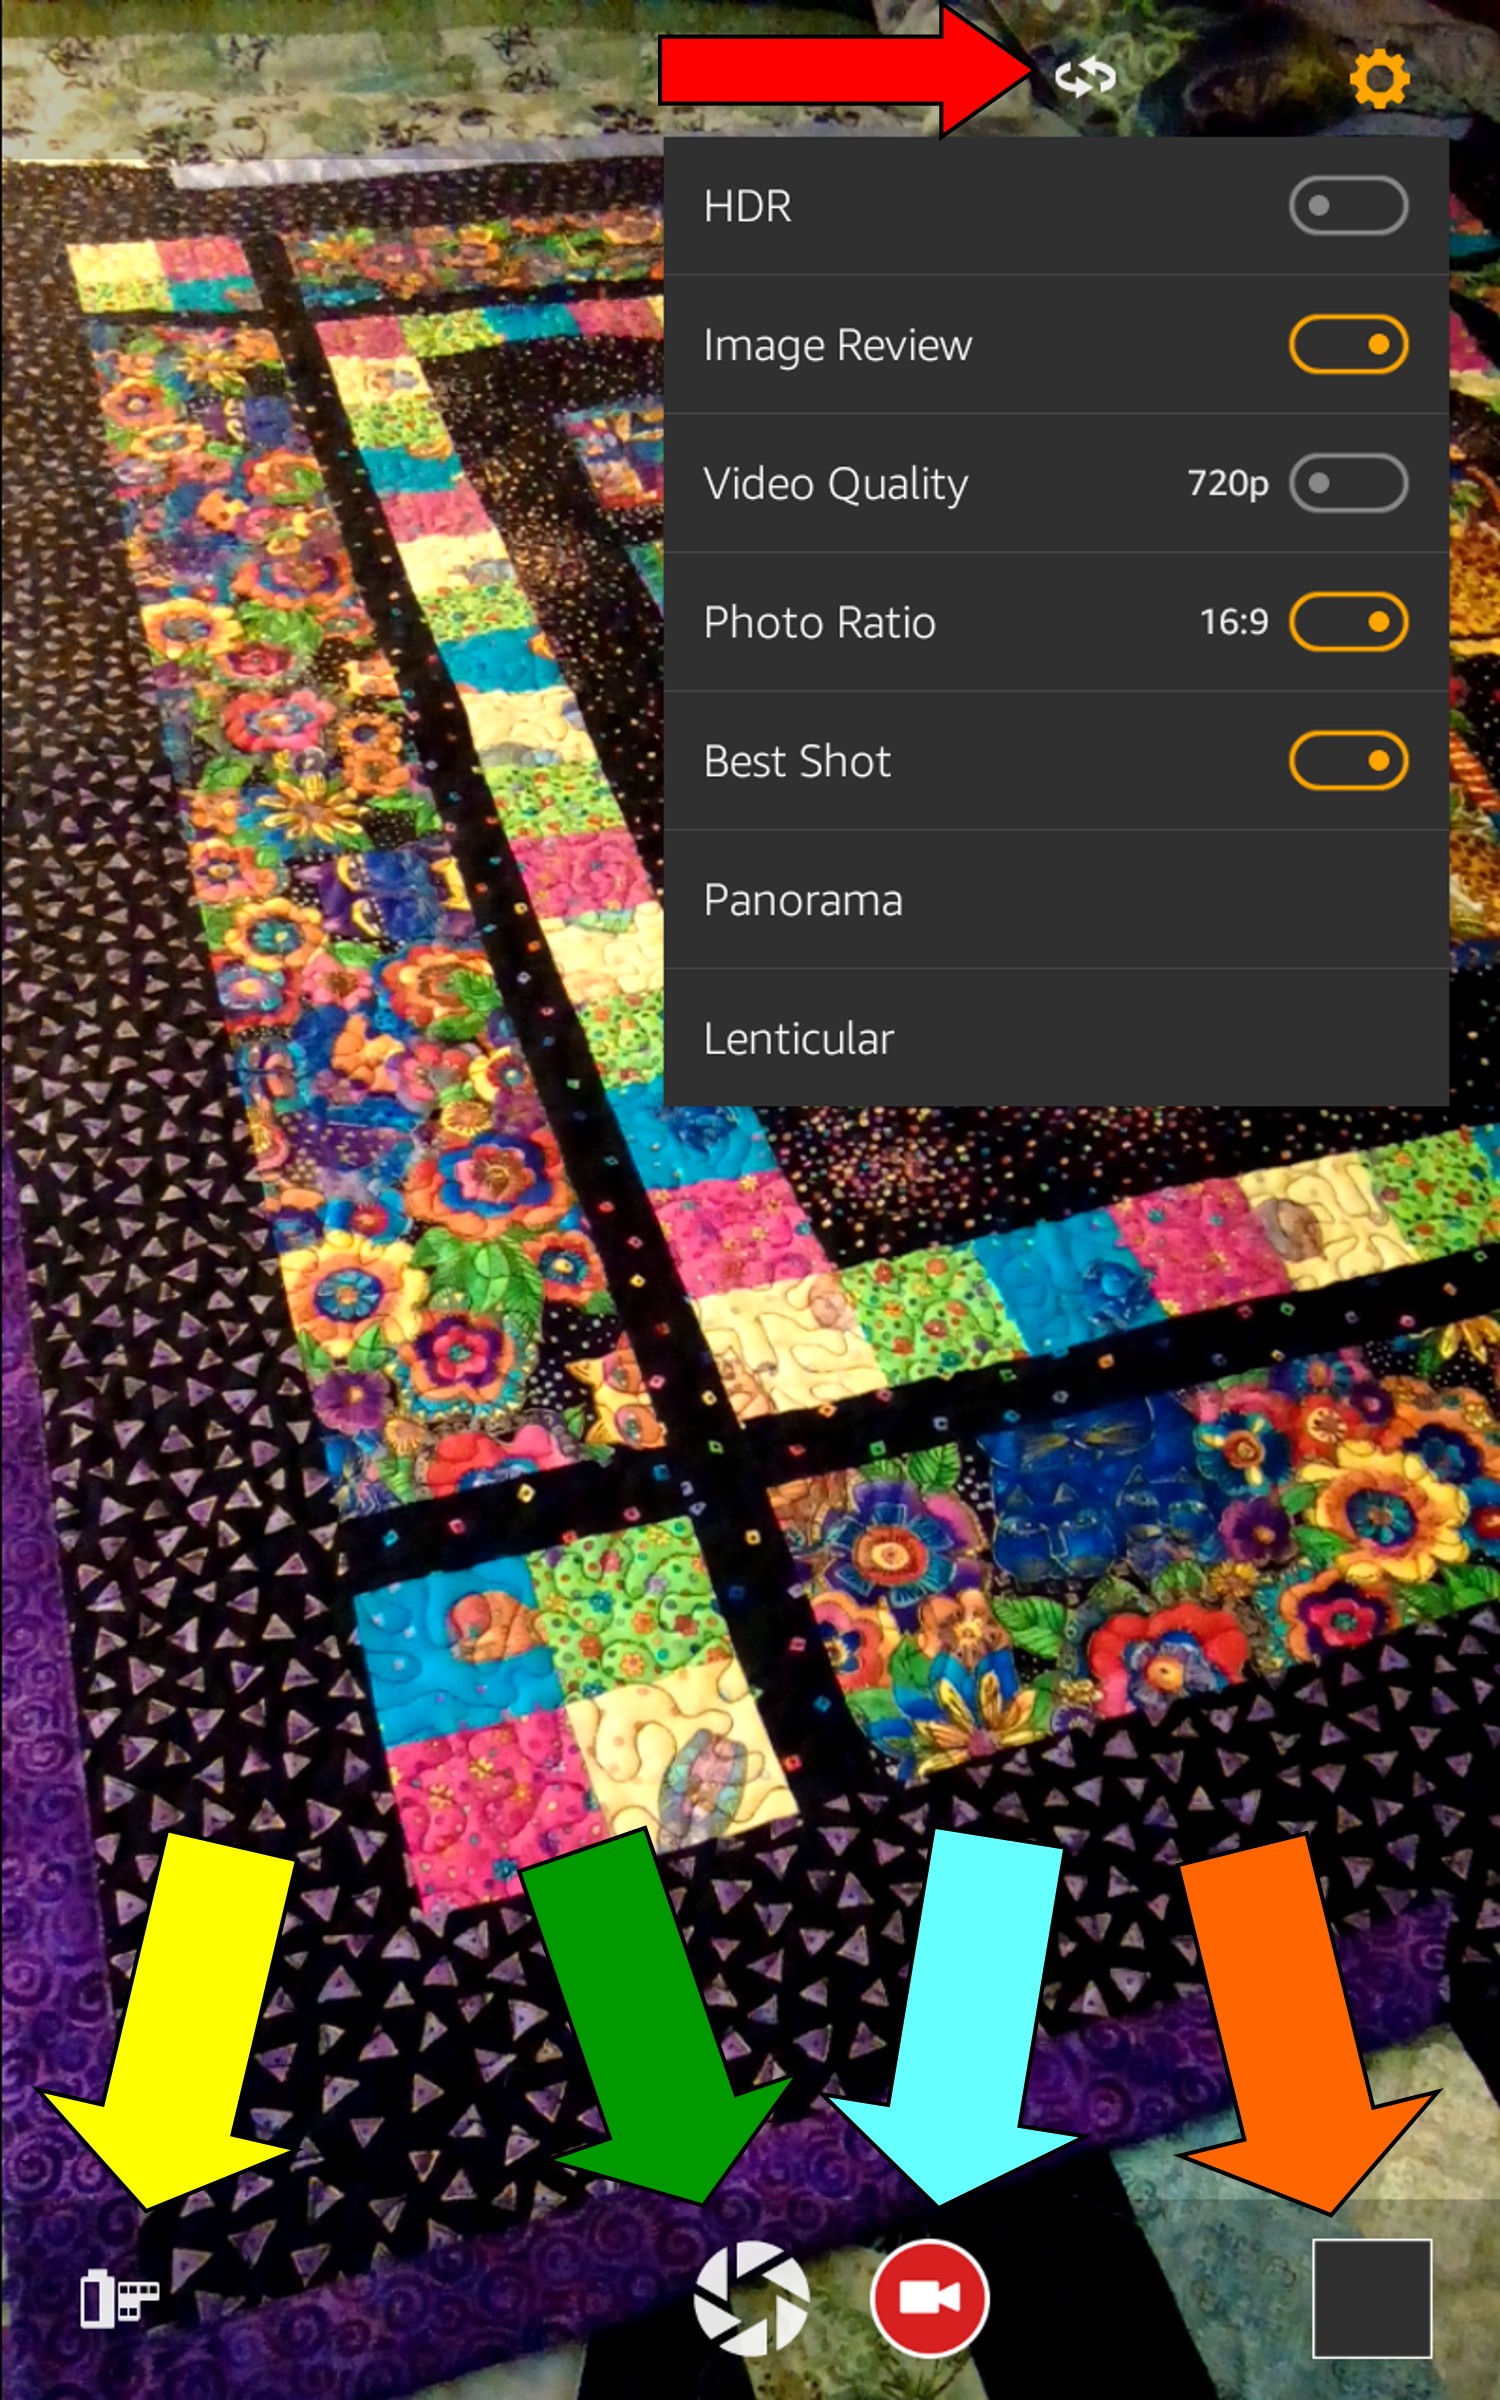
Red Arrow (top) – Toggle between front and rear cameras.
Yellow Arrow (bottom) – View camera roll.
Green Arrow (bottom) – Shutter control, tap to take a picture.
Light Blue Arrow (bottom) – Start recording video.
Orange Arrow (bottom) – Image of last picture taken; here it’s blank because I haven’t yet taken any pictures.
Camera Options/Settings Menu
Here’s what each of those items on the drop-down Options/Settings menu are all about.
HDR – a special camera feature that takes three exposures and combines them into a single picture with the best features from each; you have to hold the camera still for several seconds for this to work. See this Lifehacker article for more information about HDR.
Image Review – Review images immediately after pictures are taken, with option to delete. Toggles on or off.
Video Quality – Can be toggled between 720 and 1080 (HD).
Photo Ratio – Aspect ratio to use for photos, same as the aspect ratio setting on a TV. Can be toggled between letterbox (16:9) and standard (4:3).
Best Shot – Automatic focus/image auto-correct (e.g., color, contrast, etc.) feature. Can be toggled on or off.
Panorama – For taking panoramic pictures (much wider than normal). Can be toggled on or off.
Lenticular – For taking pictures that simulate a 3D effect. You must hold the camera steady for a couple seconds, and the image file will be much larger than usual. In my tests it also seems the images are a little darker than normal when shooting in this mode, and while I’m not seeing much of the 3D effect that could be because I was only testing indoors on images that don’t really lend themselves to 3D treatment. This is probably worth experimenting with, especially outdoors. Can be toggled on or off.
Camera – MicroSD Card
All the new Fires have a MicroSD card slot, and if you intend to take a lot of pictures or shoot a lot of video with your Fire you will definitely want one. When you first insert a card, the screen notifies you that all photos, videos, downloads, and supported app/game files will now be stored to the card by default, but that you can change this in the Settings menu.
Up Next In The Series: Silk Browser
* * *
Tech Tip of the Week: Be Reasonable About The Limitations Of Tech
* * *