 Sometimes, a case is more than you really need for your Kindle Fire. Maybe you don’t need a stand, or a keyboard, or a case that automatically puts your Fire to sleep when you close it. For many of us, all that’s needed is essentially a dust and scratch cover: something to put the Fire in so the screen is covered while it’s resting on the nightstand, or when it’s being carried in a bag or backpack. Maybe all you want is a pretty or hip ‘outfit’ for your Kindle Fire.
If you can sew, you can make your own custom Kindle Fire sleeve in two hours or less, and I’m going to show you how! Even though it’s just ten days till Christmas, you have plenty of time to make several of these as gifts or for yourself. At last, you can choose your own fabric designs and colors, to make a one-of-a-kind sleeve for your Fire that will be the envy of all who see it!
You’ll find these sleeves are so fun and easy to make that you’ll soon be cranking them out for yourself, as gifts for friends and family, or even to start your own cottage industry via an Etsy store.
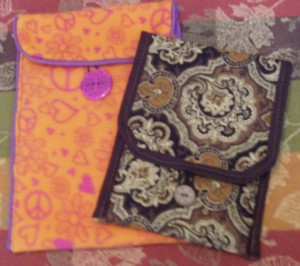
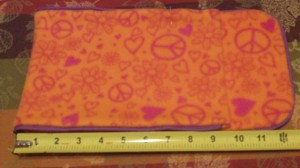
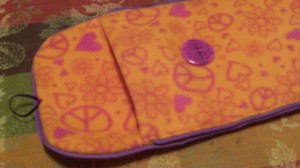
In this post, I’ll explain step-by-step how to make two different styles of covers (pictured at the beginning of this post). One is made of pre-quilted fabric, the other is made of no-pill fleece. Both are a snap to make, even for beginners!
The pre-quilted fabric sleeve will be a bit more elegant or folksy, depending on your choice of fabric. The fleece sleeve can be as bright or funky as you like, because you’ll find MANY more pattern options in no-pill fleece than you will in pre-quilted fabric.
There are many sports team logo designs available in no-pill fleece, so you could even make a sleeve featuring your guy’s favorite team! Just be sure to get the no-pill fleece, since it won’t shed tiny bits of fleece that could get into your Fire’s ports and cause problems. If your fabric store doesn’t have the no-pill fleece clearly labeled as such, check the label on the end of the bolt or ask a store employee to help you find the right fleece.
Here’s what you need, according to the various Fire sizes:
SUPPLIES FOR BOTH SLEEVE TYPES
 Kindle Fire 7″ (non-HD), Kindle Fire HD 7″:
- 1/4 yard of your chosen fabric
- one package of extra-wide double fold bias tape in a color to coordinate with your fabric (for quilted sleeve)
- one package of piping in a color to coordinate with your fabric (for no-pill fleece sleeve)
- one package of 1/8″ elastic in a color to coordinate with your fabric (you’ll only need about 12″, so if you can buy by the foot, that’s fine too),
- one button to coordinate with your fabric
- heavy-duty sewing thread in a color to coordinate with your fabric
- sewing pins
Note that the ‘supplies’ photo in this post shows different color options in piping and thread.
Kindle Fire 8.9″ models:
1/3 yard of your chosen fabric, all other supplies as listed above.
MONEY-SAVING TIP: Be sure to check the remnants bin of the fabric store, where you can find many clearance-priced pieces of fabric that are large enough for this project. Also, remember that since you’re only buying 1/4 – 1/3 of a yard, you can afford to select pricier fabrics, too!
MAKING THE PRE-QUILTED FABRIC SLEEVE
1. Iron your fabric if it has any noticeable wrinkles.
2. Cut a rectangle of fabric in the correct size, per the Kindle Fire device size:
Kindle Fire 7″ (non-HD) – 21.5″ long x 6″ wide
Kindle Fire HD 7″ – 21.75″ long x 6.75″ wide
Kindle Fire 8.9″ models – 23.5″ long x 7.75″ wide
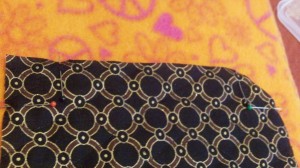
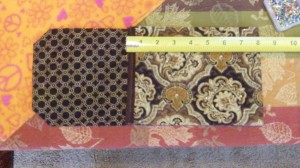
3. Trim the corners on one end of your rectangle to create curved edges at that end. The easiest way to do this and get an even corner trim is to measure 1″ from the corner on each edge, then mark each spot with a pin, and cut straight across from pin to pin, as shown in the picture (one corner has been cut, both are pinned).
4. Pin a length of bias tape across the length of the untrimmed end of the fabric rectangle and sew it into place. Remove the pins when you’re done.
5. Fold the end with the bias tape over the “wrong” side of your fabric (the side that will be the interior of the sleeve) to a length of 8″.
6. Pin bias tape all around the edges of your case, from one bottom corner to the opposite bottom corner. Note that you do not need to pin bias tape across the folded edge at the bottom.
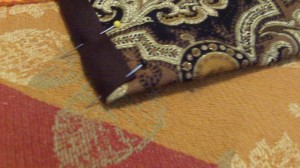
7. At the start and end points of your tape, remember to fold the raw, unhemmed ends of the tape under before pinning to prevent any future fraying of the bias tape.
8. Sew the bias tape in place, gently tucking the slight puckers of bias tape under as you round the trimmed corners at the top. Remove the pins when you’re done.
9. Cut a length of elastic that’s approximately 6″ long; you’ll be trimming much of it off, but anything shorter than 6″ will be too difficult to work with.
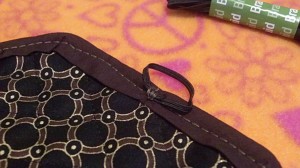
10. Form the elastic into a circle of approximately 1″ across (larger or smaller if your chosen button is especially large or small; ensure the circle can easily fit over your chosen button) and make a square knot to secure the circle closed.
11. Pin the elastic circle in the center of the top edge of your sleeve, on the wrong (inner) side and hand-stitch in place, being careful that your stitches don’t go all the way through to the other side of the fabric. Only stitch through the bias tape and wrong side of the fabric to ensure no unsightly stitches will appear on the outside of the sleeve when it’s closed.
12. Fold the top edge (with the elastic circle) down to “close” the sleeve. Gently stretch the elastic down so it’s extended to its full length, but isn’t stretching with any tension, and mark the endpoint with a pin. This is where you will sew your button.
13. Hand-sew your button onto the front of the sleeve where indicated by the pin, being careful that your stitches only go through the top layer of the fabric (not all the way through to the back of the sleeve) and being careful than any knots in your thread are on the outside of the sleeve. This is because you’re using heavy-duty thread, which is thicker than all-purpose thread and could scratch your screen if you’re regularly sliding the Fire across a knot made of such thread. Under the button is a good place to hide any knots.
Slide your Fire into the sleeve and button it shut: you’re done!
MAKING THE NO-PILL FLEECE SLEEVE
Making the no-pill fleece sleeve follows a very similar process to making the pre-quilted fabric sleeve, but it employs decorative piping around the edges instead of bias tape, and it’s constructed with double layers of fleece to create a sleeve that’s much more thick and sturdy than if you worked with a single layer of fleece.
1. Iron your fabric if it has any noticeable wrinkles.
2. Fold your fabric in half lengthwise, such that it provides a double-thickness rectangle of the size you need per the sizing chart below.
Kindle Fire 7″ (non-HD) – 21.5″ long x 6″ wide
Kindle Fire HD 7″ – 21.75″ long x 6.75″ wide
Kindle Fire 8.9″ models – 23.5″ long x 7.75″ wide
2. Trim the corners on one end of your double-thickness rectangle to create curved edges at that end. See the pin-and-cut technique shown in step 3 of the instructions for the quilted cover, above.
3. Lay your fabric out with right sides facing: one layer on top of the other, with the side of the fabric you eventually want to be on the outside of the sleeve on the inside of these two layers. One short end should have the curved edges you cut matching, the other end should be a straight, folded edge.
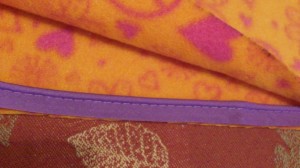
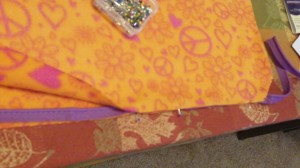
4. Lay your piping inside the two layers of fabric and pin into place between the layers. When you’re done sewing the piping down, you’ll be turning the piece inside-out to expose the “right side” of your fabric. It’s sort of like turning a pillow case inside out.
5. When you reach the trimmed corners, carefully snip the flat part of the bias tape to more easily curve it around the corners. Be careful not to cut through the seam that’s holding the piping casing shut. At the start and end points of the piping (at the bottom, folded end of your sleeve), remember to fold the raw, unhemmed ends of the piping under before pinning to prevent any future fraying.
6. Stitch all around, working close to the curved, ‘tube’ part of the piping that’s inside the layers and leaving a 6-7″ unsewn opening near the folded end on one side. You will need this opening to turn the sleeve inside out when you’re done sewing the piping into place. Remember that fleece can have considerable stretch, and be careful not to pull or distort the fabric as you sew the piping into place.
7. Remove your pins and gently turn the piece inside-out to expose the right sides of the fabric and the piping, now sewn into place. Again, be careful not to stretch the fabric as you do this.
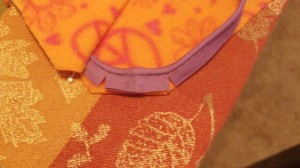
8. Tuck the edges of the unsewn 6-7″ inside and place the piping between them, then pin in place.
9. Your sleeve should now have piping all around the edges, except for the folded-over end, with the last 6-7″ of piping pinned into place but not yet sewn. Iron the sleeve on the front and the back under medium heat, being careful to keep the iron moving and being careful not to melt the pin heads as you work near the unsewn section. You will be very tempted to skip this step, but DON’T! Without ironing, the fleece will not lay totally flat and it will be difficult to complete the project without pockets and puckers showing up.
10. Fold the rectangle over to a length of 9.75″.
11. Stitch through all layers on both the top and bottom edges (the edges with piping). This will mean sewing two straight, 10″ seams and sewing the pinned opening shut as you do so. If you have a heavy duty sewing machine that’s appropriate for upholstery you can sew these seams on that machine, but everyone else will have to do it by hand because the eight layers of fleece (remember, you folded each layer under when you pinned the bias tape, so that’s eight layers in all) plus the layer of bias tape between them is too much for a standard sewing machine to handle.
At the ends of the seams near the sleeve opening, be sure to add a few extra stitches for strength so the edges won’t stretch or fray as a Kindle Fire is repeatedly put into the sleeve and taken out again.
12. Follow steps 9-13 in the quilted sleeve directions above to finish the button closure on the sleeve.
You’re all done! Be sure to cut a square or rectangle from your leftover no-pill fleece and keep it as a screen wipe. The soft fabric is ideal for that purpose.
NOW DRESS UP YOUR FIRE AND TAKE IT OUT TO SHOW OFF YOUR HANDIWORK!








Thank you so much for this neat project! Now, all I have to do is convince the “contest gods” to pull my name “out of the hat” so I can win a Kindle Fire HD (or else convince my own personal Santa that he should get it for me). Ah, well, I can dream!